How to Propagate Thyme from Cuttings and Layering

Thyme is one of those herbs that looks tougher than it really is. Give it sun, sharp drainage, and a little respect, and it usually behaves.
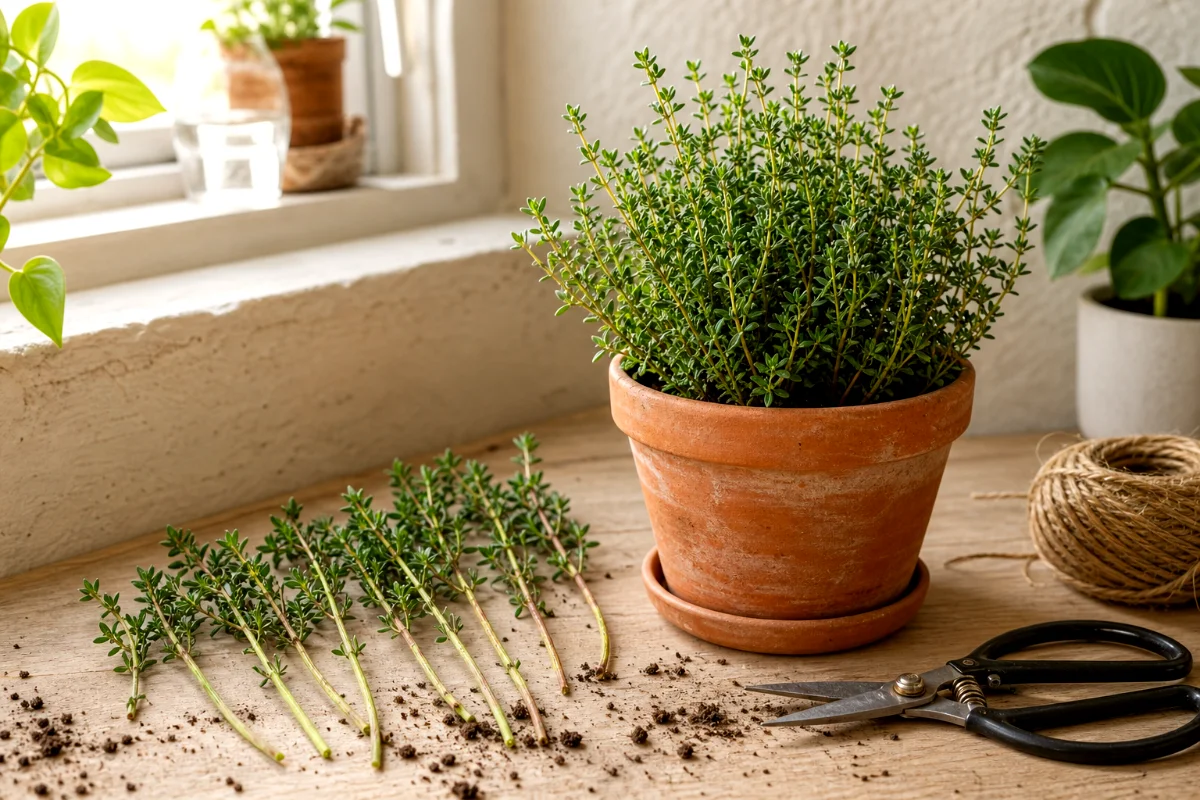
Propagating it is just as friendly. You can make new thyme plants from stem cuttings or by layering a flexible stem while it stays attached to the parent plant.
Stem cuttings usually root in about 4 to 8 weeks. Layering can take a few weeks to a couple of months, depending on the weather, the plant, and how stubborn that stem feels like being.
My honest take? Start with stem cuttings if you want several new plants fast. Use layering if you want the easiest method with the least babysitting.
Best Time to Propagate Thyme
Spring and summer give you the best odds.
That’s when thyme actively grows, so the stems carry more energy and root faster. Cool, sleepy plants in winter can root, but they drag their feet. Sometimes they just sulk.
Look for a parent plant with fresh green growth, not brittle old wood. Young stems bend a little. Woody stems snap or sit there refusing to root.
A warm windowsill, bright patio table, or sheltered greenhouse shelf works well. Avoid harsh afternoon sun while cuttings root, because small cuttings lose water fast.
What You’ll Need
You don’t need fancy gear. Good habits matter more than expensive supplies.
- Healthy thyme plant
- Clean scissors, snips, or pruning shears
- Small pots with drainage holes
- Seed-starting mix, or potting soil mixed with sand or perlite
- Clear glass of water, if rooting in water
- Rooting hormone, optional
- Plastic bag, clear cover, or propagation dome
- Pencil or dibber for making planting holes
- Plant labels, if you grow more than one thyme variety
Clean tools matter. A dirty blade can pass rot or disease into a fresh cut, and fresh cuttings don’t have much strength to fight back.
Method 1: Propagating Thyme From Stem Cuttings
This is the most common way to propagate thyme, and it’s the method I’d hand to a beginner first.
You take short, healthy pieces of non-flowering stem, remove the lower leaves, then root them in either soil or water. Simple. Not magic.
Step 1: Choose the Right Stems
Pick healthy, young, non-woody stems. Aim for pieces that measure about 3 to 5 inches, though 3 to 6 inches also works fine.
Skip stems with flowers. Flowering stems put their energy into blooms and seeds instead of roots. They can root, yes, but they’re not my first pick.
Look for stems that feel flexible and green. If the stem looks gray, hard, and woody, leave it on the plant.
Step 2: Make the Cut Below a Leaf Node
Cut just below a leaf node. That’s the little bump where leaves grow from the stem.
Why there? Nodes contain the kind of growth tissue that roots tend to form from. You don’t need a science lecture. Just remember this: cut below the bump.
Make clean cuts. Don’t crush the stems with dull scissors.
Step 3: Remove the Lower Leaves
Strip the leaves from the bottom half of each cutting.
This does two useful things. It keeps leaves from rotting under soil or water, and it encourages the bare part of the stem to focus on root growth.
Leave a small tuft of leaves at the top. The cutting still needs those leaves to make energy.
Rooting Thyme Cuttings in Soil
Soil rooting gives you sturdy little plants from the start. I prefer it for thyme because thyme loves drainage and doesn’t enjoy soggy feet.
Step 1: Prepare a Well-Draining Mix
Use damp seed-starting mix, or blend potting soil with sand or perlite.
The mix should feel like a wrung-out sponge. Moist, not dripping. If water pools in the pot, your cuttings may rot before they even think about rooting.
Thyme comes from dry, sunny places. Treat it like an herb that likes air around its roots, not mud.
Step 2: Plant the Cuttings
Poke a hole in the mix with a pencil or your finger. If you use rooting hormone, dip the cut end first, then slide it into the hole.
Firm the mix gently around the stem. Don’t pack it like concrete.
You can place several cuttings in one small pot, but give them a little breathing room. Crowded cuttings invite fungus and sad leaves.
Step 3: Add Humidity, But Don’t Suffocate Them
Cover the pot with a clear plastic bag or dome to hold humidity.
But leave a small gap for airflow. A sealed, wet chamber can turn into a rot factory, especially in warm rooms.
Set the pot in bright, indirect light. A sunny windowsill with filtered light works. Direct midday sun can cook cuttings inside a cover.
Step 4: Keep the Mix Lightly Moist
Check the pot every couple of days.
If the surface feels dry, water lightly. If it feels wet, walk away. That little act of restraint saves more cuttings than any bottle of rooting hormone.
After 3 to 4 weeks, tug very gently on a cutting. Resistance often means roots have started. Don’t yank. Be kind.
Rooting Thyme Cuttings in Water
Water rooting is fun because you can watch the roots grow. Beginners love it, and I get why. Clear glass, tiny white roots, a bit of kitchen-window drama.
Still, water roots can be delicate. Move them into soil once they reach the right length.
Step 1: Place Cuttings in a Glass
Put the prepared thyme cuttings in a clean glass of water.
Make sure no leaves sit below the waterline. Submerged leaves rot quickly, and rotting leaves make the water cloudy and sour.
A narrow jar helps hold the stems upright. Use room-temperature water if you can.
Step 2: Change the Water Often
Change the water every few days.
Fresh water keeps oxygen available and lowers the chance of slimy stems. If the glass smells bad, change it right away and rinse the stems gently.
Place the jar in bright, indirect light. Not a dark corner. Not a scorching window ledge either.
Step 3: Pot Up When Roots Are 2 to 3 Inches Long
Wait until roots reach about 2 to 3 inches.
Then pot each cutting into a small container filled with well-draining mix. Water it in gently, and keep it out of hard sun for a few days while it adjusts.
Water-grown roots need time to adapt to soil. Don’t let the new pot dry to dust during that first week.
Method 2: Propagating Thyme by Layering
Layering is the lazy gardener’s gift. I mean that kindly.
With layering, the stem roots while it still gets food and water from the parent plant. That safety line makes the method very forgiving.
This works especially well with thyme plants that already sprawl over the edge of a pot, raised bed, or garden path.
Step 1: Choose a Long, Flexible Stem
Find a stem that bends easily down to the soil.
Don’t choose an old woody branch that cracks when you move it. You want a living, bendy stem with healthy leaves at the tip.
Step 2: Pin the Middle of the Stem to Soil
Bend the stem down so the middle section touches the soil.
Hold it in place with a small rock, bent paperclip, garden pin, or a bit of wire. Cover that middle section with soil, but leave the growing tip exposed.
The buried section should stay in steady contact with moist soil. Loose contact gives weak results.
Step 3: Wait for Roots
Keep that spot lightly moist.
Roots usually form within a few weeks to a couple of months. Warm weather speeds things up, while cool weather slows the whole show.
After you see new growth or feel resistance when you tug gently, cut the new plant away from the parent. Then lift and replant it, or let it grow right where it rooted.
Soil, Water, and Light: The Little Details That Make Thyme Root
Thyme does best when you copy what it likes as an adult plant, but in a gentler way.
It wants drainage. It wants light. It wants moisture while rooting, but not swampy soil.
Use Drainage Like You Mean It
A good thyme propagation mix should drain quickly.
Add perlite, coarse sand, or fine grit to regular potting soil if it feels heavy. Heavy soil holds water around the stem, and that’s where rot starts.
Small pots need drainage holes. Always.
Keep Moisture Steady, Not Soaking
Cuttings don’t have roots yet, so they can dry out fast.
But thyme hates sitting wet. That’s the annoying little balance you’re aiming for: damp enough to support rooting, dry enough to let air reach the stem.
If you see black stems, mushy bases, or a sour smell, you’re probably overwatering.
Give Bright Indirect Light First
New cuttings need light, but they can’t handle the full force of summer sun right away.
Bright indirect light keeps them growing without stressing them. Once roots form and new growth appears, you can slowly move them toward stronger sun.
Established thyme wants full sun, usually 6 or more hours a day.
When to Transplant New Thyme Plants
Transplant thyme when the roots look strong enough to hold the soil together.
For water-rooted cuttings, wait until roots reach 2 to 3 inches long. For soil-rooted cuttings, look for new growth and gentle resistance when you tug.
Move the young thyme into a permanent pot, herb bed, raised bed, or sunny border.
- Choose a spot with full sun.
- Use well-drained soil.
- Water after planting, then let the surface dry slightly.
- Space plants so air can move around them.
Don’t plant new thyme in a low, soggy patch. It may survive for a while, but it won’t be happy. And unhappy thyme gets thin, woody, and cranky.
When Can You Harvest Newly Propagated Thyme?
Most new thyme plants can handle a light harvest in about 6 to 8 weeks, assuming they’ve rooted well and started growing.
Go easy at first.
Snip a few tips, not whole branches. That gentle trimming encourages bushier growth without stripping the young plant bare.
Never remove more than about one third of a small plant at one time. A young thyme plant needs leaves to feed itself.
Common Mistakes When Propagating Thyme
I’ve made most of these. More than once. Gardening keeps a person humble.
Using Flowering Stems
Flowering stems often root more slowly because the plant has shifted energy into blooms.
Choose fresh, non-flowering growth when you can. You’ll get cleaner, faster results.
Leaving Leaves Under Water or Soil
Buried or submerged leaves rot.
Strip the lower half of each stem before rooting. It takes ten seconds and saves a lot of disappointment.
Overwatering the Cuttings
Too much water causes rot faster than you’d think.
Keep cuttings moist, not soaked. If you’re unsure, touch the soil before watering. Your finger beats a guess.
Moving Plants Into Full Sun Too Fast
Rooted cuttings still need a short adjustment period.
Start with morning sun or filtered light, then work up to full sun over several days. Tiny plants can sunburn too.
Using Old Woody Growth
Old thyme stems can be slow to root.
Take young, flexible cuttings for the best success. If your thyme plant has become woody, trim it lightly through the growing season to push fresh shoots.
Soil Rooting or Water Rooting: Which Is Better?
If you want my plain answer, use soil.
Soil-rooted thyme usually transitions better because it grows roots in the same kind of environment it will live in later. Less shock. Fewer surprises.
Water rooting still works, and it’s satisfying for beginners because you can see progress. Just don’t wait forever to pot the cuttings. Long, tangled water roots often break during transplanting.
Try both if you have enough cuttings. That’s how gardeners learn fastest.
FAQ About How to Propagate Thyme
Can you propagate thyme from grocery store stems?
Sometimes, yes, if the stems are fresh, green, and not dried out.
But grocery herbs often sit chilled for days, so success can be hit or miss. Garden-fresh cuttings root far better.
Do thyme cuttings need rooting hormone?
No. Rooting hormone can help, especially in soil, but thyme often roots without it.
If you already have some, use a light dip. If you don’t, don’t make a special trip just for that.
How long does thyme take to root?
Most thyme cuttings root in about 4 to 8 weeks.
Warmth, fresh growth, and steady moisture speed things along. Cold rooms and soggy mix slow everything down.
Can I propagate thyme indoors?
Yes, you can propagate thyme indoors near a bright window.
Use bright indirect light while rooting, then move established plants into stronger light. A grow light helps if your windows are dim.
Why are my thyme cuttings turning black?
Black stems usually mean rot.
You may have too much water, poor airflow, heavy soil, or leaves buried under the surface. Take fresh cuttings and use a lighter, better-draining mix.
Can I propagate creeping thyme the same way?
Yes. Creeping thyme roots well from cuttings and layering.
Layering works especially well because creeping thyme naturally trails along the soil and often roots where stems touch the ground.