How to Propagate Bird of Paradise: The Beginner-Friendly Way

If you want to learn how to propagate Bird of Paradise, start with one clear truth: division wins.
Not cuttings. Not leaf pieces. Not wishful thinking in a glass of water.
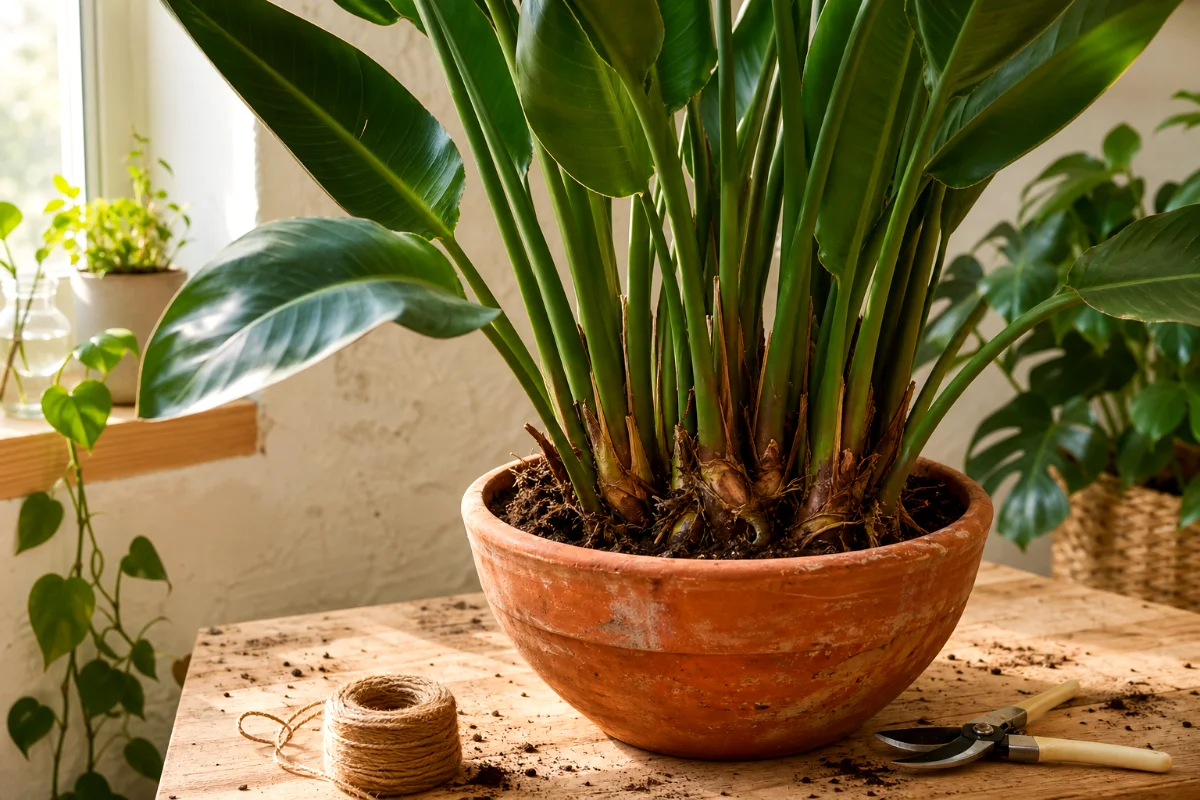
Bird of Paradise, also called Strelitzia, grows from a thick root system with clumping fans of leaves. That means the best way to make more plants is to divide a mature root ball during repotting, preferably in early spring.
Seeds can work too. But they test your patience. We’re talking years before you get a mature plant, and most beginners don’t want to babysit a pot of mystery soil for half a decade.
The Best Time to Propagate Bird of Paradise
The sweet spot is early spring, right as the plant starts gearing up for active growth.
Spring gives your new divisions warmth, brighter days, and a long growing season to settle in. Early summer can also work, especially if your plant lives in a warm, bright room or outdoors in a mild climate.
Avoid dividing in the dead of winter if you can. The plant grows slowly then, and recovery can drag on like a cold cup of tea.
Before You Start: Make Sure Your Plant Is Ready
A Bird of Paradise should be mature before you divide it. I like to see a full pot with several leafy fans, not one lonely stem trying its best.
Look for these signs:
- Several separate fans of leaves growing from the base
- Roots circling the pot or filling the container
- A plant that dries out faster than it used to
- New shoots pushing from different spots in the soil
- A plant that feels crowded but still looks generally healthy
Don’t divide a weak, pest-covered, or freshly stressed plant. Let it recover first. Propagation asks a lot from the roots.
Why Division Works Better Than Cuttings
Bird of Paradise plants don’t root from a single leaf or bare stem cutting. That’s the part many beginners get wrong, usually because other houseplants make it look easy.
A pothos cutting can root from a node. A monstera cutting can root from a node. But a Bird of Paradise leaf stuck in water will stay a leaf for a while, then fade. Sad stuff.
For a new Strelitzia plant to grow, it needs an actual piece of the crown and root system. In plain English, each division needs a fan of leaves and attached roots.
What You’ll Need
- A mature Bird of Paradise with more than one fan of leaves
- Clean pots with drainage holes
- Fresh, well-draining potting mix
- A sharp knife or pruning saw
- Rubbing alcohol or another tool sanitizer
- Gardening gloves
- A tarp, old sheet, or newspaper to catch soil
- Watering can
Use gloves. Those thick roots can be stubborn, and a clean grip helps. Also, sanitize your knife before cutting. Dirty tools can carry bacteria and fungal trouble straight into fresh root wounds.
Best Soil for Bird of Paradise Divisions
Bird of Paradise likes moisture, but it hates sitting in soggy soil. That sounds fussy, but it’s easy once you picture the roots.
They’re thick. Almost fleshy. They store water, but they still need air around them.
Use a potting mix that drains well but doesn’t turn bone dry in one afternoon. A good beginner mix looks like this:
- High-quality indoor potting mix
- Perlite or pumice for air pockets
- Orchid bark for chunky drainage
- A little compost, if you grow outdoors or in a very bright spot
Skip heavy garden soil in pots. It compacts, holds too much water, and can smother roots. I’ve seen more Bird of Paradise plants sulk from wet feet than from almost anything else.
Method 1: Propagate Bird of Paradise by Division
This is the method I recommend first, second, and third. It’s reliable, and the new plants grow much faster than seedlings.
A divided Bird of Paradise may look like a proper plant within 1 to 2 years, depending on the size of the division and growing conditions. Seed-grown plants often need 3 to 5 years to look mature.
Step 1: Water the Plant the Day Before
Water your Bird of Paradise one day before dividing it. Moist roots bend better than dry roots, and the plant handles the move with less shock.
Don’t soak it into a swamp. Just water normally and let the excess drain.
Step 2: Prepare the New Pots
Choose pots that fit the divisions without drowning them in extra soil. A huge pot looks generous, but it often stays wet too long.
Add fresh, well-draining potting mix to each pot. Leave enough space so each division can sit at the same depth it grew before.
Step 3: Remove the Plant from Its Container
Lay the pot on its side and ease the plant out. If it refuses to budge, squeeze the sides of a plastic pot or run a dull knife around the inside edge.
For terracotta, take your time. Terracotta holds roots like a handshake.
Once the plant comes free, shake off loose soil so you can see the root structure. Don’t strip every crumb away. Just clear enough to see where the plant naturally separates.
Step 4: Find the Natural Fans
Look at the base of the plant. You’ll usually see clusters, or fans, where leaves rise together from the crown.
That’s your map. Follow each fan down to its roots.
Each division should have:
- At least one healthy fan of leaves
- A solid section of crown
- Plenty of attached roots
- No mushy, black, or foul-smelling root sections
If you can separate a clump by hand, great. If not, use your clean, sharp knife.
Step 5: Cut Through the Root Ball
Make firm, clean cuts through the thick root ball. Don’t hack at it like firewood.
But don’t be too timid either. Bird of Paradise roots are tough, and mature plants sometimes need a decisive cut.
After each cut, check that every piece has leaves and roots. A rootless fan will struggle. A chunk of roots with no growing point won’t give you the plant you want.
Step 6: Pot Each Division at the Same Depth
Set each division in its new pot at the same depth it grew before. Burying the crown too deeply can invite rot.
Backfill with fresh mix and gently firm the soil around the roots. Don’t pack it down hard. Roots need air as much as they need water.
Step 7: Water Lightly
Water the fresh divisions lightly so the soil settles around the roots. Let excess water drain from the bottom.
This isn’t the moment for a deep, dramatic soak unless the mix is extremely dry. Fresh cuts and soggy soil make a bad team.
Step 8: Give Bright, Indirect Light
Place the divisions in a bright, warm spot with indirect light. Keep them out of harsh direct sun for the first few days.
After that, slowly move them back toward their normal light. Bird of Paradise loves brightness, but fresh divisions need a gentle landing.
What to Expect After Division
Your plant may droop.
That doesn’t mean you killed it. Bird of Paradise divisions often look limp, tired, or slightly sulky for 1 to 2 months after dividing.
The roots need time to heal and grab into fresh soil. During that time, don’t fuss too much. Most overcare starts with panic and ends with root rot.
Normal Aftercare Signs
- Leaves droop for several weeks
- Older leaves yellow slowly
- Growth pauses for a while
- The plant uses less water than usual
Warning Signs to Watch
- Mushy stems at the soil line
- Bad smell from the pot
- Black, soft roots if you inspect the soil
- Soil staying wet for many days
- Fast yellowing across most leaves
If the soil stays wet too long, increase airflow, move the plant to brighter indirect light, and hold off on watering. Don’t fertilize a stressed division right away.
Watering New Bird of Paradise Divisions
Water when the top few inches of soil feel dry. Use your finger, not a calendar.
New divisions don’t drink as fast as established plants because their roots are healing. If you water on autopilot, you may keep the soil too wet.
Here’s my simple rule: when in doubt, wait another day. Bird of Paradise can handle a short dry spell far better than sour, airless soil.
When to Fertilize After Propagation
Wait at least 4 to 6 weeks before feeding a newly divided Bird of Paradise. Longer is fine if the plant still looks stressed.
Once you see fresh growth, start with a diluted balanced fertilizer during the growing season. Half strength works well. No need to show off.
Method 2: Propagate Bird of Paradise from Seeds
Seed propagation works, but it’s a slow road. If division feels like making a new plant from a sturdy slice of the old one, seeds feel more like raising a toddler from scratch.
Still, it can be fun. Just know what you’re signing up for.
Step 1: Clean the Seeds
Bird of Paradise seeds are black and often come with an orange, hairy aril attached. Remove that orange fuzz before soaking.
It looks interesting, but it can encourage mold if left on the seed.
Step 2: Soak in Warm Water
Soak the seeds in warm water for 1 to 2 days. This softens the hard outer shell and helps moisture reach the seed.
Change the water daily if it looks cloudy.
Step 3: Sow 1 Inch Deep
Plant each seed about 1 inch deep in damp, high-quality potting mix. Use small pots or a seed tray with drainage.
The mix should feel like a wrung-out sponge. Damp, not dripping.
Step 4: Keep Seeds Warm
Warmth matters here. Aim for about 21 to 27 C, or 70 to 80 F.
Germination may take weeks or months. Yes, months. This is why I don’t push seeds on impatient beginners.
Step 5: Grow Seedlings Slowly and Steadily
Once seedlings appear, give them bright indirect light and steady moisture. Don’t let them bake in hot sun.
Expect a long wait before they look like the dramatic Bird of Paradise you know from plant shops. Seed-grown plants often need 3 to 5 years to mature.
Division Versus Seeds: Which Should You Choose?
Choose division if you want the fastest, most reliable way to propagate Bird of Paradise.
Choose seeds if you enjoy slow projects, experiments, and the tiny thrill of seeing something sprout after you’d nearly given up on it.
For most home growers, division makes more sense. You start with a real piece of a mature plant, complete with leaves and roots. That head start matters.
Common Bird of Paradise Propagation Mistakes
Trying to Root a Leaf Cutting
A Bird of Paradise leaf in water may stay green for a bit, but it won’t grow into a new plant. It lacks the crown tissue needed for new growth.
Pretty? Maybe. Propagation? No.
Dividing Too Small
Tiny pieces struggle. Give each division a fair amount of roots and at least one strong fan of leaves.
If your plant only has one fan, wait. Let it grow bigger first.
Using a Dirty Knife
Fresh cuts leave roots open to infection. Clean your blade before cutting, and clean it again between questionable sections.
Planting Too Deep
Keep the crown near the same soil level as before. If you bury it, moisture can sit around the base and cause rot.
Overwatering After Repotting
This one gets people. A droopy plant makes you want to water more, but droop after division often comes from root stress, not thirst.
Check the soil first. Always.
How Long Does Bird of Paradise Propagation Take?
With division, your new plant may need 1 to 2 months just to look perky again. New growth can take longer, especially indoors.
With good light, warmth, and patient watering, divisions often grow into fuller plants within 1 to 2 years.
Seeds move much slower. Germination can take weeks or months, and maturity often takes 3 to 5 years.
Best Light for New Bird of Paradise Plants
Give new divisions bright, indirect light at first. A spot near an east-facing window often works beautifully.
After the plant settles, you can increase light. Mature Bird of Paradise plants love bright conditions and can handle some direct sun when acclimated.
But don’t shove a fresh division into blazing afternoon sun. That’s like asking someone to run a race right after surgery.
FAQ
Can you propagate Bird of Paradise from a cutting?
No. Bird of Paradise won’t grow from a leaf cutting or a plain stem cutting. You need a division with a fan of leaves and attached roots.
Can you propagate Bird of Paradise in water?
Not in the way you would propagate pothos or philodendron. A division may sit briefly while you prepare a pot, but it should grow in soil, not water.
How many roots does each division need?
Give each division plenty of healthy roots and at least one leafy fan. More roots mean faster recovery and less drama.
Why is my divided Bird of Paradise drooping?
Drooping is normal after division and can last 1 to 2 months. Keep the plant warm, bright, and lightly watered while it adjusts.
Should I fertilize right after dividing?
No. Wait until the plant settles and shows signs of fresh growth. Fertilizer won’t fix root stress, and it can make things worse if you use too much.
What is the best month to propagate Bird of Paradise?
Early spring is best. Spring gives the plant a full growing season to repair roots and push new growth.