How to Propagate Venus Fly Trap: 3 Easy Beginner Methods

Venus flytraps look exotic, fussy, and a little dramatic. Fair enough. But propagating them isn’t some secret greenhouse trick.
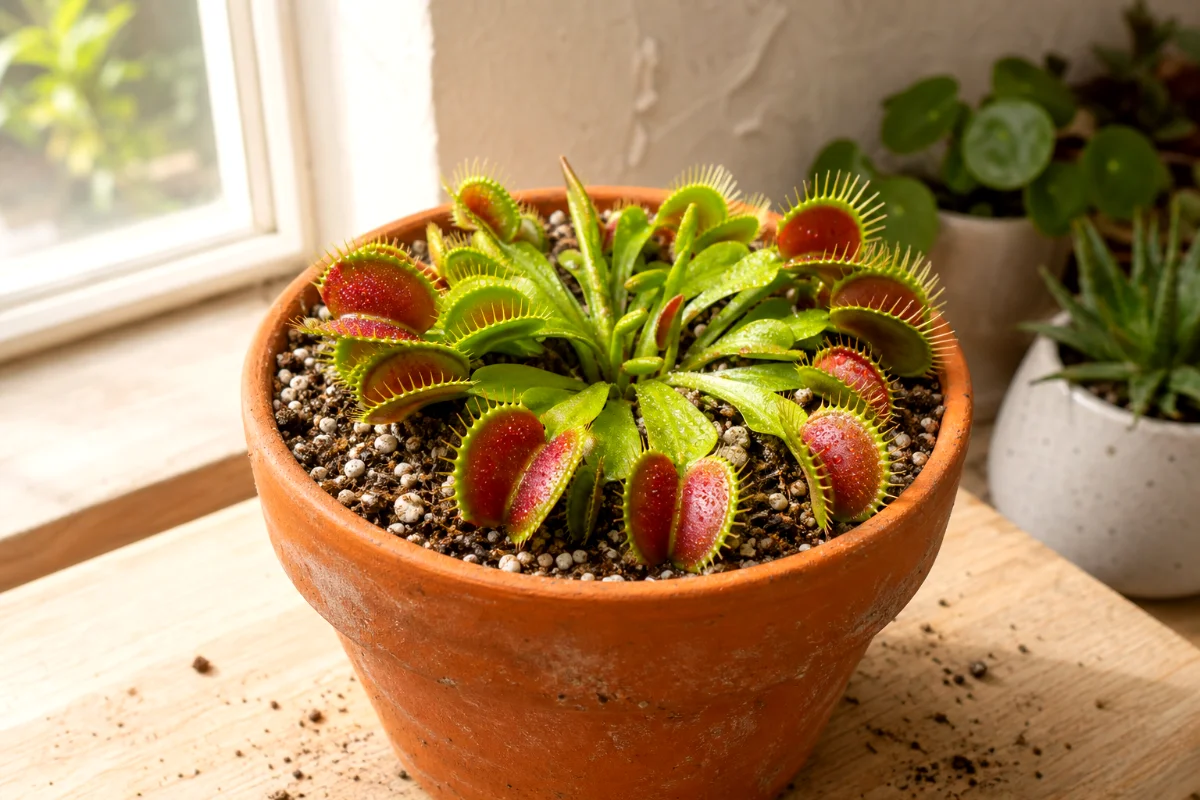
The best way to propagate a Venus fly trap is by division in spring, especially when you already have a mature plant with more than one growth point. You can also use leaf pullings or flower stalk cuttings, both of which work well if you give them clean media, pure water, and high humidity.
Here’s my blunt gardener’s take. If your plant is big enough to divide, divide it. If it’s still small, don’t bully it. Try one or two leaf pullings instead.
Before You Start: Get the Growing Mix Right
Venus flytraps grow in poor, acidic, wet soil in the wild. That means normal potting soil is the enemy here. So is fertilizer.
Use a simple carnivorous plant mix:
- 50 percent peat moss
- 50 percent perlite or coarse silica sand
Rinse the perlite first if it looks dusty. That powder can turn the pot into a sludgy little swamp, and flytrap roots hate that.
Keep the mix damp, not bone dry and not sour-smelling. Think wet sponge. Not soup.
Use the right water, every time
This part matters more than beginners expect. Use only distilled water, reverse osmosis water, or rain water.
Tap water often carries minerals that build up in the soil. Venus flytraps can’t handle that for long. The plant may limp along for a bit, then the traps blacken, growth stalls, and everyone blames the plant.
It’s usually the water.
Method 1: Rhizome Division, the Fastest and Easiest Way
Division is the quickest way to get a new Venus flytrap because you’re not asking the plant to start from scratch. You’re separating a plant that has already made extra growing points.
The rhizome is the white, bulb-like base under the leaves. Mature flytraps often form clumps over time. During repotting, you’ll see those little crowns sitting close together like they’re sharing a tiny apartment.
When to divide a Venus flytrap
Do this in spring, right as the plant starts active growth. Spring division gives each piece a full growing season to settle in.
You can divide during repotting. That’s the neatest time because the plant is already out of the pot, and you’re not disturbing it twice.
How to divide the rhizome
- Water the plant the day before so the roots loosen more easily.
- Slide the plant from its pot and gently shake away loose media.
- Look for separate crowns or growth points connected at the white rhizome.
- Tease the sections apart with your fingers. Go slow.
- Make sure each division has roots attached.
- Pot each division into fresh carnivorous plant soil.
- Water with distilled, reverse osmosis, or rain water.
Sometimes the divisions pull apart with almost no effort. Other times, they’re stubborn. If you need to cut, use clean scissors or a clean blade, but don’t start hacking away like you’re carving a roast.
Why division works so well
A divided plant already has leaves, a crown, roots, and stored energy in the rhizome. That’s why it rebounds faster than a cutting.
But don’t divide a weak plant. If your flytrap has tiny traps, mushy roots, or no strong growth points, let it recover first. Propagation should come from strength, not desperation.
Method 2: Leaf Pullings, Small but Surprisingly Productive
Leaf pullings sound odd at first. You don’t cut a leaf in half and hope for magic. You gently pull a whole leaf downward so a tiny piece of the white rhizome base comes with it.
That white bit is the difference between success and disappointment. A plain green leaf with no base attached usually just melts away.
How to take a leaf pulling
- Choose a healthy outer leaf, not the newest tiny growth in the center.
- Hold the plant steady at the crown.
- Pull the leaf downward and away from the rhizome in one gentle motion.
- Check the end of the leaf for a small white, fleshy base.
- Place the leaf on damp peat and perlite mix, or bury only the white end vertically.
- Cover the pot or tray with a clear bag or humidity dome.
- Keep it in bright, indirect light.
I prefer laying the leaf mostly flat with the white end pressed into the media. It gives good contact without burying the whole leaf and inviting rot.
Humidity makes the difference
Leaf pullings lose moisture fast because they don’t have roots. High humidity buys them time.
A clear plastic bag works fine. Nothing fancy. Leave a small bit of air space, and open the bag every few days so the cutting doesn’t sit in stale, fungal air.
New plantlets usually show up in 1 to 2 months. At first, they look ridiculously small. Tiny green nubs. Then little traps form, and yes, they’re adorable.
What to avoid with leaf pullings
- Don’t use fertilizer. Ever.
- Don’t put cuttings in hot, direct sun under plastic.
- Don’t let the media dry out.
- Don’t keep poking the leaf to check for roots.
That last one gets people. Leave it alone. A watched leaf pulling grows like cold molasses.
Method 3: Flower Stalk Cuttings, the Clever Middle Option
Venus flytraps can produce tall flower stalks in spring. Flowering takes energy, and many growers cut the stalk off unless they want seeds.
Good news. You can use that stalk to grow another plant.
When to cut the flower stalk
Cut it when the stalk is about 2 to 3 inches tall, before the buds open. At that stage, the tissue is young enough to root and push new growth more readily.
If the stalk is already tall, woody, and blooming, your odds drop. It may still work, but I wouldn’t bet the potting bench on it.
How to plant a flower stalk cutting
- Use clean scissors to cut the stalk near the base.
- Cut the stalk into a short section if needed, keeping the lower end clear.
- Push the stalk vertically into damp peat and perlite mix.
- Firm the media gently around it so it stands upright.
- Cover it with a clear bag or dome for humidity.
- Place it in bright, indirect light or under strong grow lights.
The stalk can produce a new plant at its base. It won’t happen overnight. But when it works, it feels like you got a bonus plant from something many growers throw away.
What About Growing Venus Flytraps From Seed?
You can grow Venus flytraps from seed. But it’s slow. Very slow.
Seed-grown plants may take 3 to 5 years to reach mature size. That’s fine if you enjoy long projects and have patience to spare. Beginners who want faster results should start with division, leaf pullings, or flower stalk cuttings.
Seeds also need fresh, reliable sourcing. Old seed often sprouts poorly, and mislabeled seed has fooled plenty of new growers.
Light, Warmth, and Aftercare for New Flytrap Plants
Propagation doesn’t end when the cutting goes into the pot. The aftercare decides whether it grows or rots.
Light
Give cuttings bright, indirect light at first. Strong artificial light also works well, especially indoors.
Be careful with sealed bags in direct sun. They heat up fast. I’ve seen healthy cuttings cook in an afternoon because someone thought more sun would mean more growth.
Moisture
Keep the media consistently damp with pure water. Many growers set the pot in a shallow tray of distilled water during active growth.
Don’t flood tiny cuttings in deep water. Damp is good. Stagnant and sour is not.
Humidity
For leaf and stalk cuttings, high humidity helps during the first few weeks. A clear bag, propagation box, or covered tray does the job.
Once you see new growth, start opening the cover a little more each week. This hardens the young plant off and prevents a sudden shock when you remove the cover.
Common Mistakes Beginners Make
Most propagation failures come from simple stuff. Not bad luck. Not a cursed plant shelf.
- Using regular potting soil: It contains nutrients that burn carnivorous plant roots.
- Watering with tap water: Mineral buildup slowly damages the plant.
- Dividing too small: Weak divisions struggle and may die back.
- Taking leaf pullings without the white base: The cutting needs rhizome tissue to form plantlets.
- Sealing cuttings in hot sun: Plastic covers can trap heat and cause rot.
- Feeding new plantlets too soon: Let them grow leaves and roots before they catch or receive insects.
And please don’t trigger the traps for fun while the plant is recovering. It wastes energy. The plant has work to do.
Which Propagation Method Should You Choose?
If you have a mature clump, choose rhizome division. It’s fast, clean, and beginner-friendly.
If your plant has healthy leaves but isn’t ready to split, try leaf pullings. Take only a few so the mother plant still has plenty of foliage.
If your plant sends up a flower stalk and you don’t want seeds, try a flower stalk cutting. It’s efficient and makes good use of growth you’d likely remove anyway.
FAQ
Can I propagate a Venus flytrap in water?
I don’t recommend it. Venus flytraps prefer damp, acidic media with good air around the base. Use peat and perlite instead of plain water.
How long does Venus flytrap propagation take?
Divisions can settle in within a few weeks. Leaf pullings often make plantlets in 1 to 2 months. Seed-grown plants take 3 to 5 years to mature.
Do Venus flytrap cuttings need a humidity dome?
Leaf pullings and flower stalk cuttings do better with high humidity for the first few weeks. Divisions usually don’t need a sealed cover if they have roots.
Can I use coco coir instead of peat moss?
I avoid it unless I know it has been thoroughly rinsed and tested. Many coco products contain salts, and Venus flytraps hate salts. Peat and perlite stays more predictable for beginners.
Should I let my Venus flytrap flower before propagating?
If you want flower stalk cuttings, cut the stalk before it blooms, when it’s about 2 to 3 inches tall. If you want seeds, let it flower, but expect a long wait for mature plants.