How to Propagate Scented Geraniums: A Beginner’s Guide to Unlimited Plants
Imagine turning one lemon, rose, or peppermint-scented geranium into a dozen healthy new plants. You absolutely can. Scented geraniums, formally known as Pelargoniums, offer incredible fragrances and beautiful foliage. They also happen to be some of the most rewarding plants to multiply at home.
Many beginners feel intimidated by plant propagation. You might worry about making the wrong cut or accidentally killing your favorite houseplant. Put those fears aside. Scented geraniums actively want to grow roots, and you just need to give them the right environment to do so.
This guide walks you through the exact methods professional growers use to ensure success. We will cover the reliable soil method, the fun water-rooting alternative, and crucial expert steps like stem callusing. Grab your pruning shears, and let’s start multiplying your plant collection.
Soil Propagation: The Professional’s Choice
While water propagation looks great on a windowsill, planting directly in soil provides the most consistent and robust results. Soil gives new roots the dark, stable environment they naturally crave. Follow these precise steps to propagate your scented geraniums in soil.
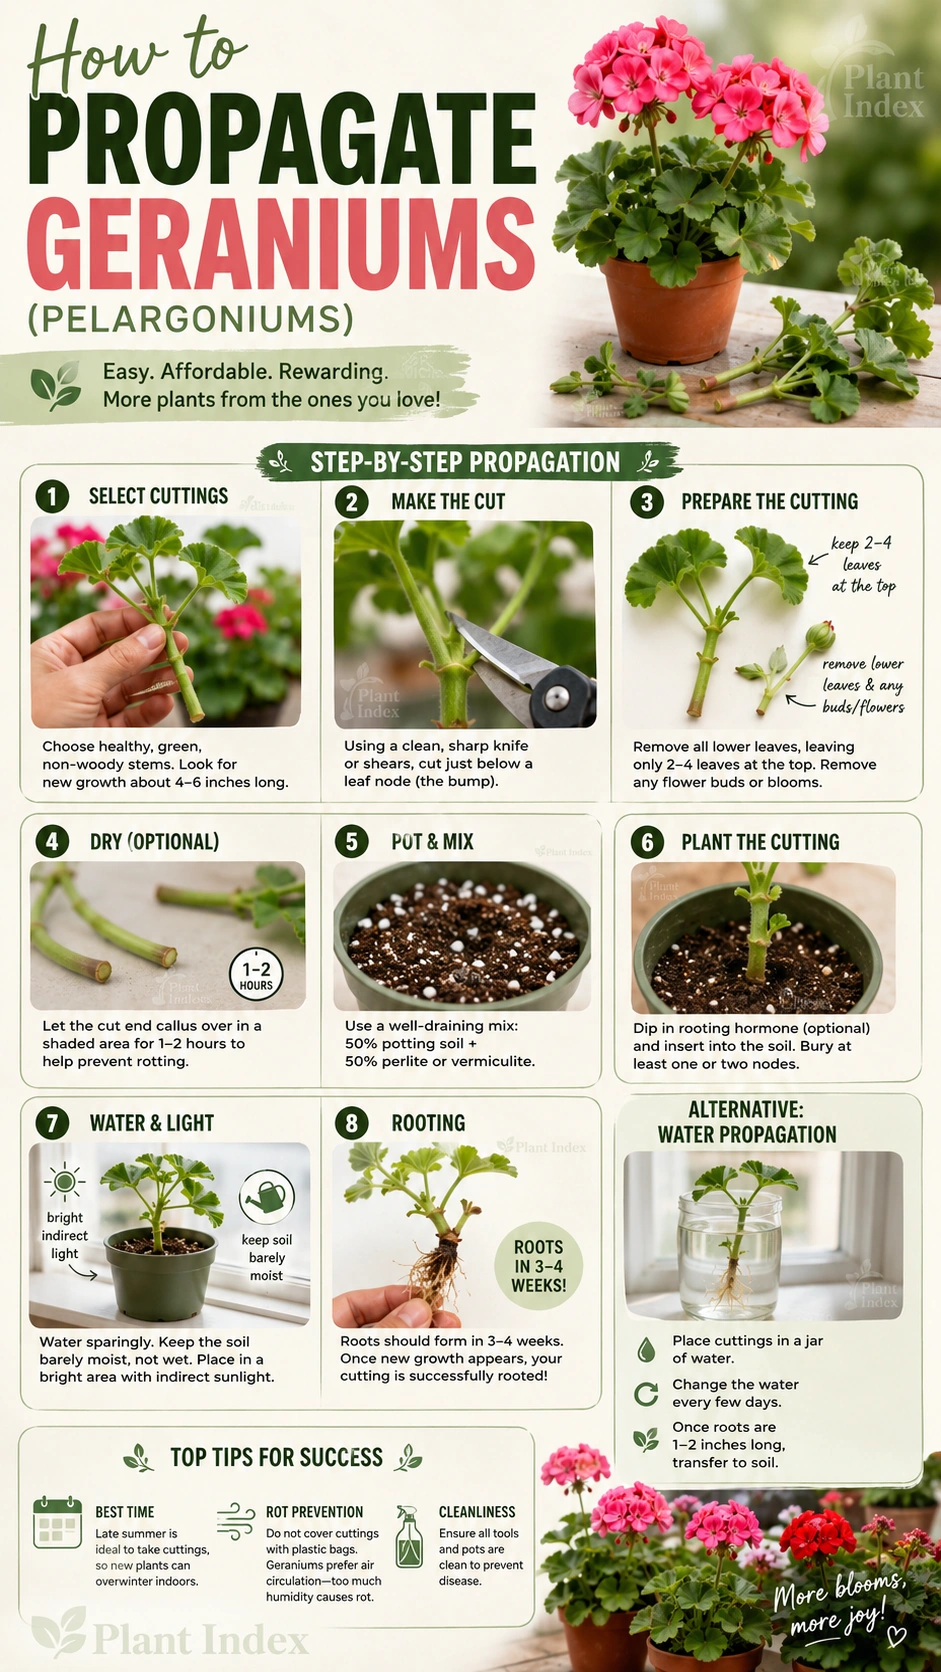
1. Select the Perfect Cutting
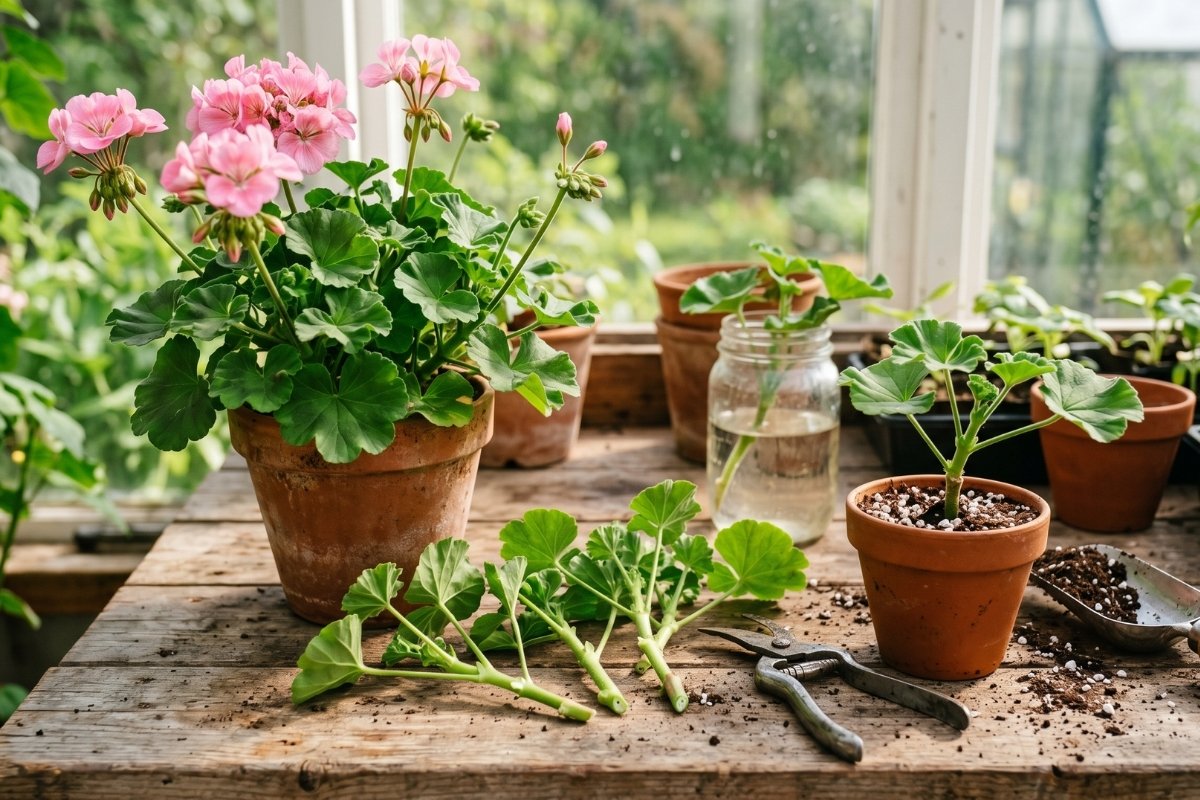
Choose healthy, non-flowering stem tips that measure about 3 to 6 inches long. Ensure each stem has three to four nodes, which are the visible bumps where leaves attach to the stem. Avoid flowering stems, because you want the plant to direct all its energy into growing new roots rather than blooming.
2. Sterilize and Make a Clean Cut
Wipe your pruning shears with 70% isopropyl alcohol before making any cuts. This crucial step prevents harmful bacteria from infecting your new plant. Snip the stem just below a leaf node, and carefully strip the leaves off the bottom half of your cutting. Buried leaves quickly rot, ruining your cutting before it ever grows roots.
3. Let the Stem Callus (Crucial Step)
Do not skip this step. Lay your freshly prepared cuttings on a dry paper towel for 12 to 24 hours before planting. This allows the cut end to dry out and form a protective seal, known as a callus. Callusing drastically reduces the risk of stem rot, which is the number one cause of propagation failure.
4. Apply Rooting Hormone
Scented geraniums root quite easily on their own. However, applying a rooting hormone speeds up the entire process and increases your success rate. Simply dip the callused end of the stem into the powder or gel just before planting.
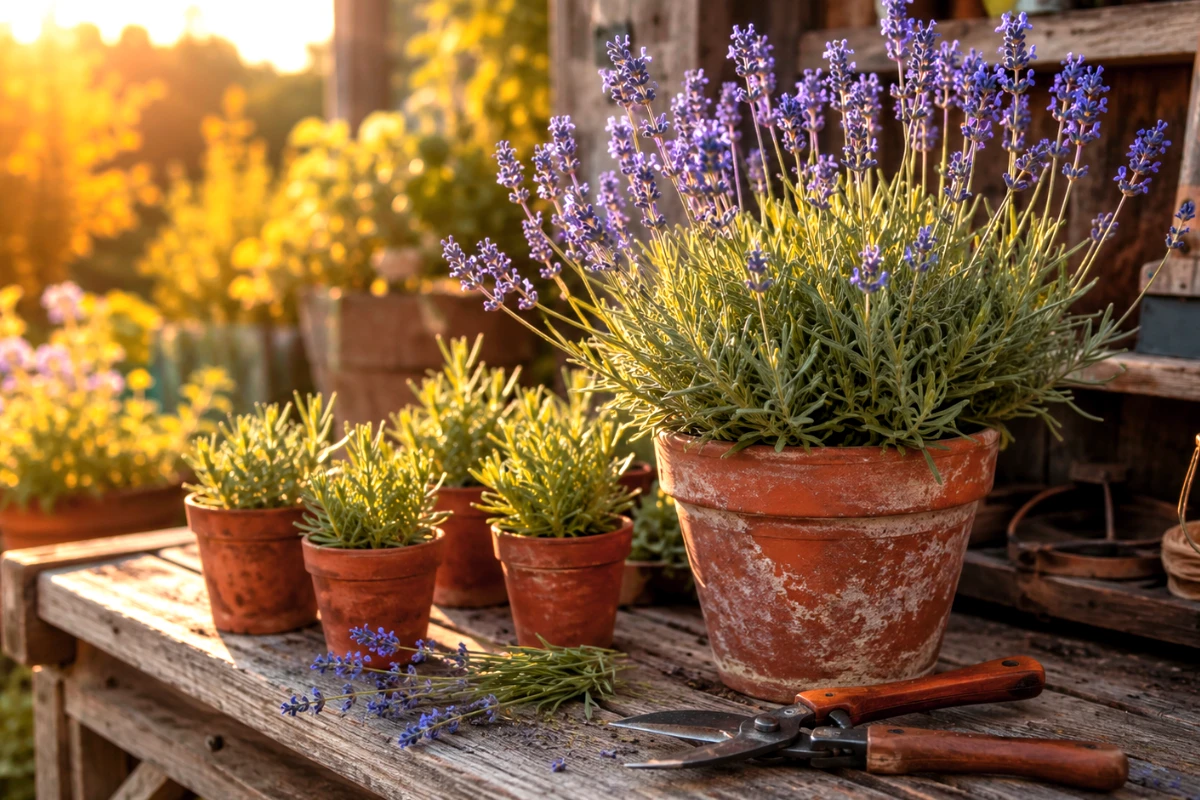
5. Plant in the Right Mix
Fill small 2 to 4 inch pots with a specialized, well-draining medium. Professionals recommend mixing standard potting soil with perlite or coarse sand at a 2:1 ratio. This specific blend holds enough moisture to encourage root growth while providing the vital drainage necessary to keep the stem healthy.
6. Set Up the Ideal Environment
Place your freshly potted cuttings in a warm area that receives bright, indirect light. Never put new cuttings in direct sunlight. Intense sun will quickly scorch the delicate, unrooted stems and dry out the soil too fast.
7. Maintain Proper Moisture
Keep the soil consistently moist, but never let it become soggy or waterlogged. Overwatering suffocates the developing roots. With proper care, you will see strong roots develop in 2 to 6 weeks. You will know they have rooted when you gently tug the stem and feel resistance.
Water Propagation: A Fun Alternative
Rooting cuttings in water offers a fun, visual way to propagate. You get to watch the entire root development process happen right before your eyes. While slightly less consistent than soil, it remains a fantastic option for beginners.
- Take your prepared 3 to 6-inch cutting and let it callus overnight.
- Place the callused cutting in a clean glass jar.
- Add just 1 to 2 inches of room-temperature water, ensuring the bottom node sits fully submerged.
- Change the water every three days to replenish oxygen and prevent bacterial growth.
- Wait until the new roots grow about 1 inch long before moving the plant.
- Transplant the rooted cutting carefully into your 2:1 potting soil mix to continue its growth.
Pro Tips for Guaranteed Success
Even the easiest propagation methods require a little strategic timing and environmental awareness. Master these professional tips to elevate your gardening game.
Save Your Plants from Winter Frost
Use propagation to overwinter your outdoor scented geraniums. Take several cuttings in early autumn before the first frost hits your region. Root these cuttings indoors, keep them on a sunny windowsill through the winter, and plant them back outside in the spring.
Manage Your Watering Habits
Once your new cuttings establish strong root systems, change your watering routine. Mature scented geraniums absolutely hate wet feet. Let the top inch of soil dry out completely between waterings to mimic their natural, slightly arid South African habitat.
Ditch the Humidity Dome
Many propagation guides tell you to cover cuttings with a plastic bag to lock in humidity. Do not do this with scented geraniums. Their fuzzy leaves trap moisture easily, making them highly susceptible to fungal rot in high-humidity environments. Keep them out in the open air.
Hold Off on Fertilizer
Resist the urge to feed your new cuttings right away. Wait until the plant pushes out at least two sets of new leaves, which indicates a strong root system. When you do fertilize, dilute a balanced liquid fertilizer to half-strength to avoid burning the tender new roots.
Conclusion
Propagating scented geraniums offers a simple, zero-cost way to expand your garden and share your favorite fragrant plants with friends. Whether you choose the highly reliable soil method or the visually rewarding water method, success comes down to a few basic rules.
Sterilize your tools, let those stems callus, and avoid the temptation to overwater. Trust the process, follow these steps, and you will have a thriving collection of new geraniums in just a few weeks.
Frequently Asked Questions (FAQ)
Why did the bottom of my cutting turn black and mushy?
This is a classic sign of stem rot, usually caused by skipping the callusing step or overwatering the soil. Always let your cuttings dry for 12 to 24 hours before planting, and ensure your potting mix drains quickly.
How long does it take for scented geranium cuttings to root?
Cuttings typically develop a healthy root system within 2 to 6 weeks. Soil temperature and lighting directly impact this timeline, so keep them warm and well-lit.
Do I absolutely need to use rooting hormone?
No, you do not. Scented geraniums are vigorous growers and root easily on their own. Rooting hormone simply acts as an insurance policy to speed up the process and protect the cut stem from disease.
Should I cover my geranium cuttings with a plastic bag?
Absolutely not. While high humidity helps tropical houseplants root, it causes fuzzy-leaved plants like scented geraniums to rot. Leave your cuttings uncovered in normal room humidity.
