How to Propagate Wax Plant from Cuttings

If you want to learn how to propagate a wax plant, start with stem cuttings. That’s the method I trust most, especially for beginners.
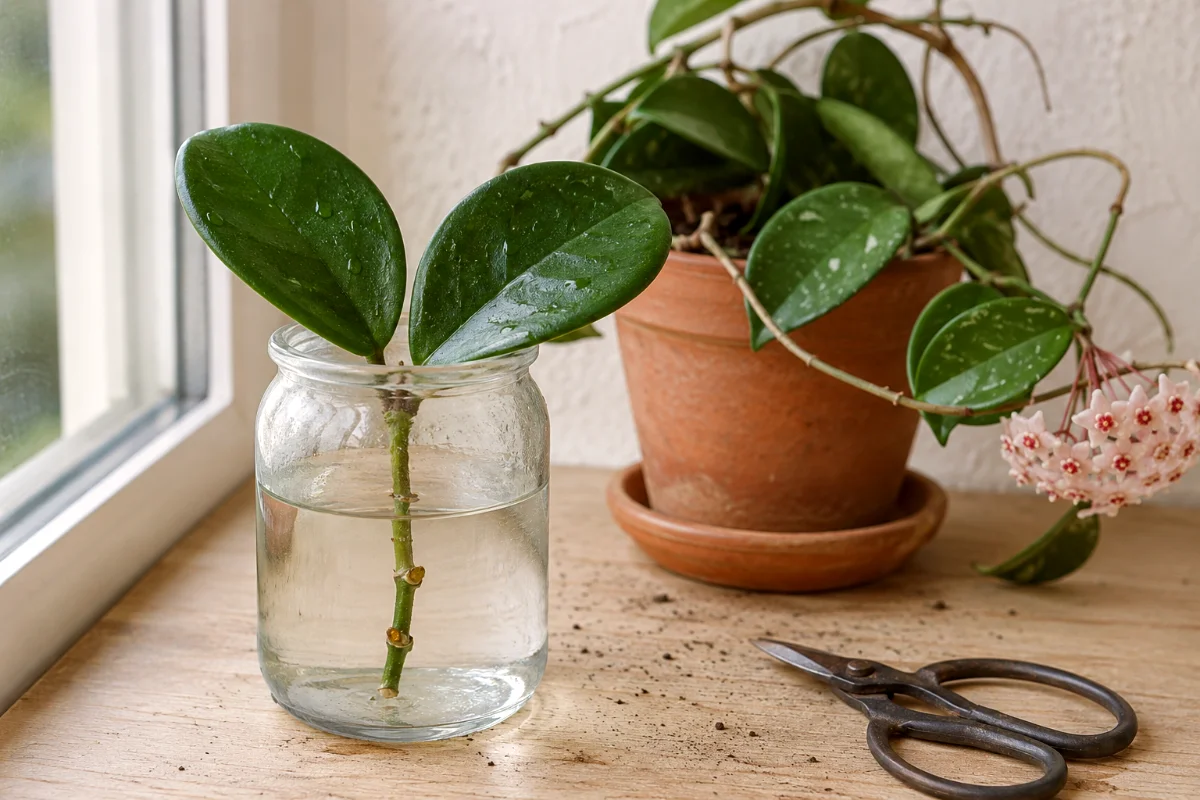
Wax plant, also called Hoya, looks fancy with its thick, shiny leaves and sweet little flower clusters. But propagation? Surprisingly doable. You don’t need a greenhouse, a science degree, or a drawer full of gadgets.
You need a healthy stem, a node or two, warmth, patience, and bright light that doesn’t scorch the leaves. That’s the whole game.
Spring and summer give you the best odds because the plant is already in growth mode. It wants to push roots then. In winter, it often sulks. Fair enough. We all slow down when the light gets weak.
What You Need Before You Cut
Set up your supplies before you snip. Hoya cuttings can sit out for a short while, but beginners do better when everything is ready.
- Clean scissors or pruning snips
- A healthy wax plant with non-blooming stems
- A clear jar for water propagation
- Moist perlite, damp sphagnum moss, or well-draining potting mix
- Small pot with drainage holes
- Rooting hormone, optional
- Plastic bag, clear bin, or propagation dome for humidity
Clean tools matter. A dirty blade can spread rot or disease, and Hoya cuttings don’t enjoy that kind of drama.
The Best Time to Propagate Wax Plant
Propagate wax plant in spring or summer. That’s when the plant has more energy, longer daylight, and a better chance of making roots fast.
Can you do it in fall? Sometimes. Can you do it in winter? Yes, if your house stays warm and bright. But if you ask me, winter propagation is like baking bread in a cold kitchen. It can work, but it takes more fussing.
For beginners, choose the easy season. Stack the odds in your favor.
Choose the Right Hoya Stem Cutting
Pick a healthy, non-blooming stem. Don’t cut a stem that’s carrying flowers or buds. The plant will try to feed the flowers instead of making roots, and that slows everything down.
Look for a stem that feels firm, not wrinkled or mushy. The leaves should look plump and glossy.
How Long Should the Cutting Be?
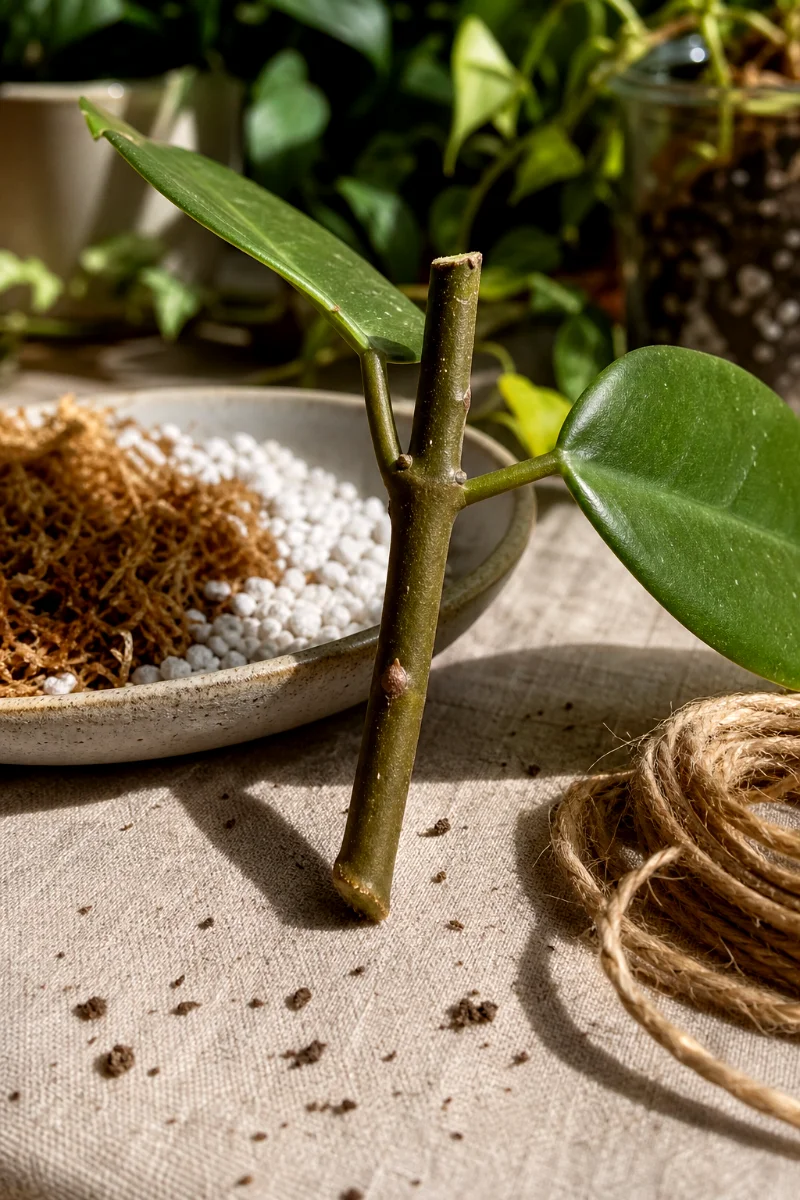
Cut a stem about 3 to 4 inches long. Make sure it has at least two nodes.
A node is the little bump or joint where leaves attach to the stem. This is where roots usually form. No node, no real chance. A plain leaf might stay green for ages, but it won’t become a full Hoya plant without stem tissue and a node.
Where to Make the Cut
Cut just below a node. Use sharp, clean snips and make a neat cut.
Then remove the lower leaves. Keep the top leaves, because they help the cutting make energy, but strip any leaves that would sit below water, moss, perlite, or soil.
Leaves buried in wet media rot. Fast. And rot spreads like gossip at a garden club meeting.
Method 1: Water Propagation for Wax Plant
Water propagation is the easiest method for most beginners. You can see the roots forming, which helps you know when things are working.
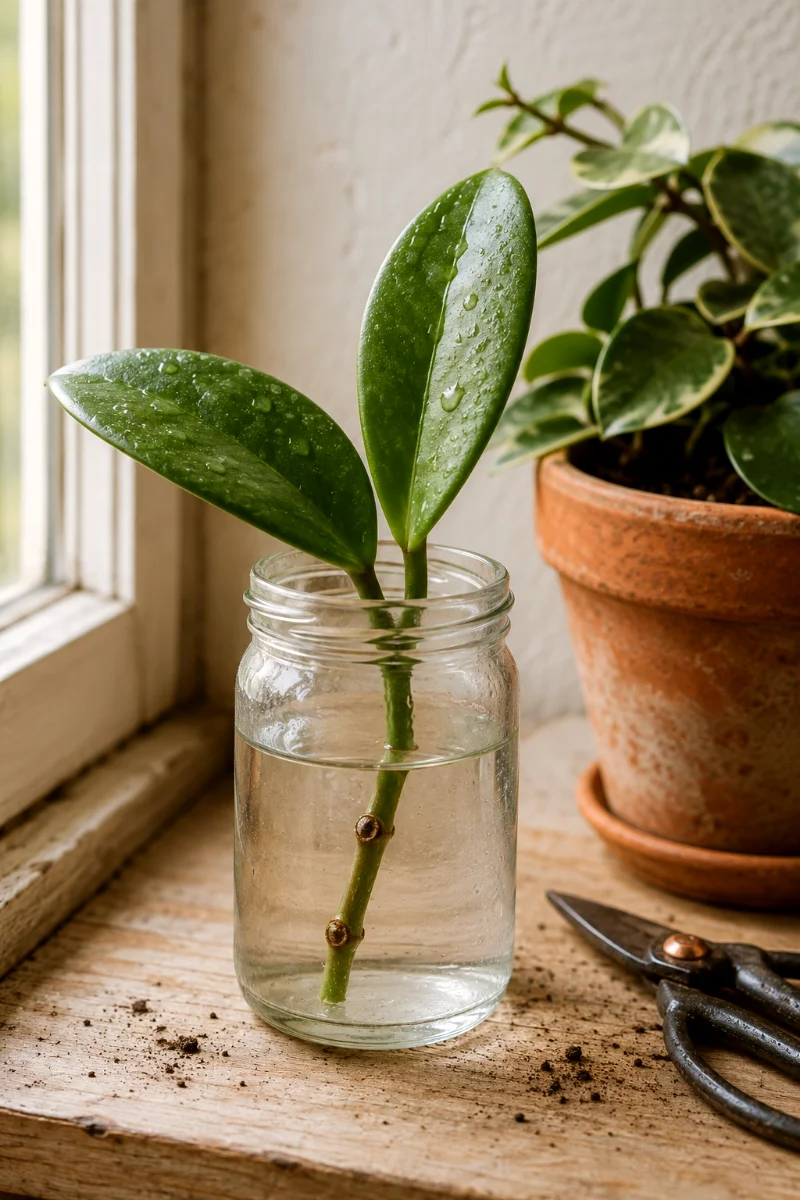
Use a small clear jar or glass. Fill it with room-temperature water. Place the cutting in the jar so one or two nodes sit below the water line, while all leaves stay above the surface.
Steps for Water Propagation
- Take a 3 to 4 inch stem cutting with at least two nodes.
- Remove the lower leaves.
- Place the cutting in a jar of water.
- Keep at least one node under water.
- Set the jar in bright, indirect light.
- Change the water once a week.
- Pot the cutting when roots reach 1 to 2 inches long.
Don’t put the jar in harsh direct sun. Clear glass plus hot sun can cook tender stems. Bright, indirect light works better.
Roots usually appear in a few weeks. Some Hoyas move quickly. Others take their sweet time and make you question your life choices. Stay calm.
When to Move Water-Rooted Hoya to Soil
Move the cutting to potting mix when the roots measure about 1 to 2 inches long. Don’t wait until you have a giant tangle of water roots.
Water roots grow soft and delicate. If you let them get too long, they break more easily during potting. Shorter roots adjust to soil with less fuss.
After potting, keep the mix lightly moist for the first week or two. Not soggy. Just evenly damp, like a wrung-out sponge.
Method 2: Propagating Wax Plant in Perlite or Sphagnum Moss
This is my favorite method when I want faster, stronger rooting. Perlite holds moisture while keeping lots of air around the stem. Sphagnum moss holds humidity beautifully, almost like a mini greenhouse.
And Hoyas love that mix of moisture and air. They hate sitting in heavy, wet muck.
How to Root Hoya Cuttings in Perlite
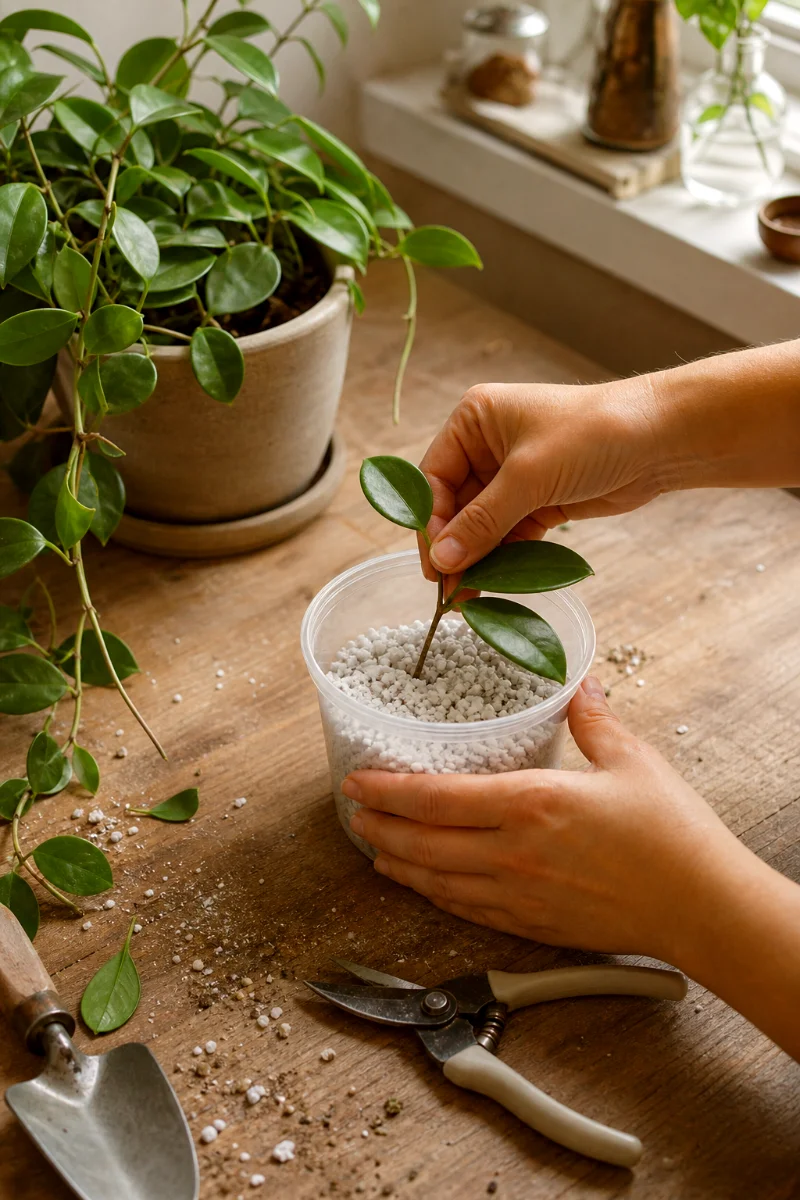
- Rinse perlite so the dust doesn’t fly everywhere.
- Moisten it, then let extra water drain away.
- Fill a small cup or container with damp perlite.
- Insert the cutting so at least one node sits below the surface.
- Cover loosely with a clear bag or place it in a clear bin.
- Keep it in bright, indirect light.
Perlite should feel damp, not swampy. If water pools in the bottom, pour it off.
I like clear cups for this method because you can sometimes see roots against the sides. It feels a bit like cheating, in the best way.
How to Root Hoya Cuttings in Sphagnum Moss
Soak the moss first, then squeeze it hard. It should feel moist and springy, not dripping.
Wrap damp moss around the node and place the cutting in a small container. Keep the lid slightly vented, or open it every day for fresh air.
Moss gives great humidity, but it can rot cuttings if you pack it too tight. Keep it airy. Hoya roots need oxygen as much as they need moisture.
Method 3: Propagating Wax Plant Directly in Soil
Soil propagation skips the water stage. Some gardeners love it because the cutting grows soil roots from the start.
But beginners sometimes struggle here because they can’t see what’s happening below the surface. Still, it works well if you use the right mix.
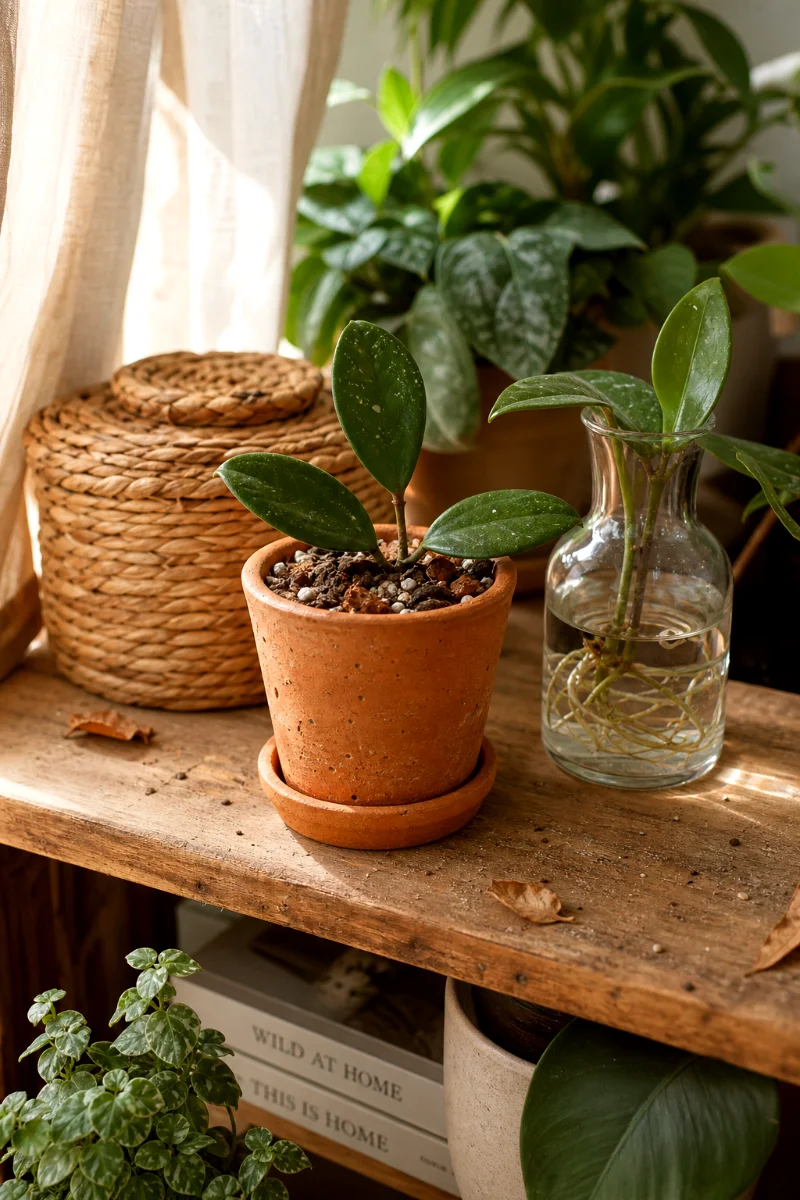
Best Soil Mix for Hoya Cuttings
Use a well-draining potting mix. A chunky mix beats a dense one every time.
- Potting mix
- Perlite
- Orchid bark
- A small amount of coco coir or peat-based mix
The goal is simple: hold light moisture while letting extra water drain away. Hoya stems rot when the mix stays wet and airless.
Steps for Soil Propagation
- Take a healthy 3 to 4 inch cutting.
- Remove lower leaves.
- Dip the cut end in rooting hormone, if you want.
- Make a small hole in the potting mix.
- Place one or two nodes under the mix.
- Firm the mix gently around the stem.
- Water lightly.
- Cover with a clear bag for humidity, but keep it from touching the leaves.
Rooting hormone can help, but it isn’t magic powder. Good stems, clean cuts, warmth, and humidity matter more.
Why Nodes Matter So Much
Here’s the part beginners miss most often: nodes make the roots.
A Hoya leaf on its own may look alive for months. It may even stay cute in a little pot. But without a node, it won’t grow vines and become a real plant.
That bump on the stem contains the growth points. Roots can emerge there. New shoots can form there too.
So when you place your cutting in water, moss, perlite, or soil, make sure at least one node sits where the moisture is. Two nodes give you better odds.
Light, Humidity, and Warmth: The Rooting Triangle
Hoya cuttings root best in bright, indirect light. Put them near a window with filtered light, or a few feet back from a sunny window.
Too little light slows rooting. Too much direct sun stresses the cutting and dries it out.
Humidity helps too. A cutting has no roots at first, so it can’t replace lost moisture very well. Higher humidity keeps the leaves from drying while the stem works on roots.
Easy Humidity Tricks
- Place cuttings inside a clear storage bin.
- Cover the pot with a clear plastic bag.
- Use a propagation dome.
- Group cuttings together near other houseplants.
- Mist only if your setup has airflow.
Don’t seal cuttings in a wet, airless box and forget them. That’s how mold throws a party.
Open the cover every day or two. Let fresh air in. Check for mushy stems while you’re there.
Alternative Method: Layering an Established Wax Plant
Layering works beautifully if your wax plant already has long vines. It’s slower to set up, but it’s gentle because the stem stays attached to the parent plant while roots form.
Set a small pot of moist, well-draining mix beside the mother plant. Lay a vine across the surface and choose a node. Pin that node into the mix with a bent paper clip, floral pin, or small piece of wire.
Cover the node lightly with soil. Keep it slightly moist. Once roots form and the new section resists a gentle tug, cut it free from the parent plant.
This method suits nervous beginners. The parent plant keeps feeding the vine while the buried node roots.
How Long Does Wax Plant Propagation Take?
Most wax plant cuttings root in a few weeks when they get warmth, humidity, and bright indirect light.
Some take longer. Hoya varieties differ, and household conditions matter. A cutting on a warm windowsill in June may root much faster than one sitting in a chilly room in February.
Don’t tug on cuttings every day. I know it’s tempting. Resist.
If you root in soil, test gently after a few weeks. A rooted cutting gives slight resistance. An unrooted one slides around easily.
Common Mistakes When Propagating Wax Plant
I’ve made most of these mistakes myself. Once. Maybe twice.
- Using a cutting with no node: A leaf alone won’t grow into a proper Hoya plant.
- Submerging leaves in water: Wet leaves rot and foul the water.
- Keeping soil too wet: Hoya cuttings need moisture and air, not mud.
- Using harsh direct sun: Hot sun can stress or burn cuttings.
- Skipping humidity: Dry indoor air can shrivel cuttings before they root.
- Potting water roots too late: Long water roots break and struggle when moved to soil.
If a cutting turns black, mushy, or smells bad, toss it. Don’t try to save rot with hope and wishful thinking.
Potting Up Your Rooted Hoya Cutting
Use a small pot. Really. Don’t plant a tiny rooted cutting in a big pot.
Big pots hold too much moisture around small root systems. That leads to rot, especially with Hoyas.
Choose a pot with drainage holes and a chunky, airy mix. Plant the cutting gently, firm the mix just enough to hold it upright, and water lightly.
Then place it back in bright, indirect light. Keep humidity a little higher for another week while it adjusts.
Aftercare for a New Wax Plant
Once the cutting settles in, treat it like a young Hoya, not a full-grown tough guy.
- Water when the top part of the mix starts to dry.
- Keep it in bright, indirect light.
- Avoid fertilizer until you see new growth.
- Use a small trellis or clips if vines start wandering.
- Keep it warm and away from cold drafts.
New growth tells you the roots are doing their job. That’s your green light to relax a little.
Don’t rush flowers. Wax plants often need maturity, good light, and steady care before blooming. Let the young plant build roots and vines first.
FAQ About How to Propagate Wax Plant
Can you propagate wax plant from a single leaf?
A single leaf may root, but it usually won’t grow into a full plant unless it includes a piece of stem with a node. Always take a stem cutting with at least one node.
Is water or soil better for Hoya propagation?
Water is easier for beginners because you can watch the roots grow. Soil works well too, but it needs better moisture control.
Why is my Hoya cutting not rooting?
It may need more warmth, brighter indirect light, higher humidity, or more time. Also check that a node sits in water or media.
Should I use rooting hormone on wax plant cuttings?
You can, especially for soil propagation. But you don’t have to. Healthy cuttings root without it when conditions stay warm, humid, and bright.
How often should I change the water?
Change the water once a week. If it looks cloudy or smells off, change it sooner.
When can I give away a propagated wax plant?
Wait until the cutting has rooted well and shows new growth. A plant with fresh growth handles travel and repotting much better.