How to Propagate Air Plants: A Beginner’s Guide to Tillandsia Pups

Air plants look like they should have some mysterious propagation trick. They don’t.
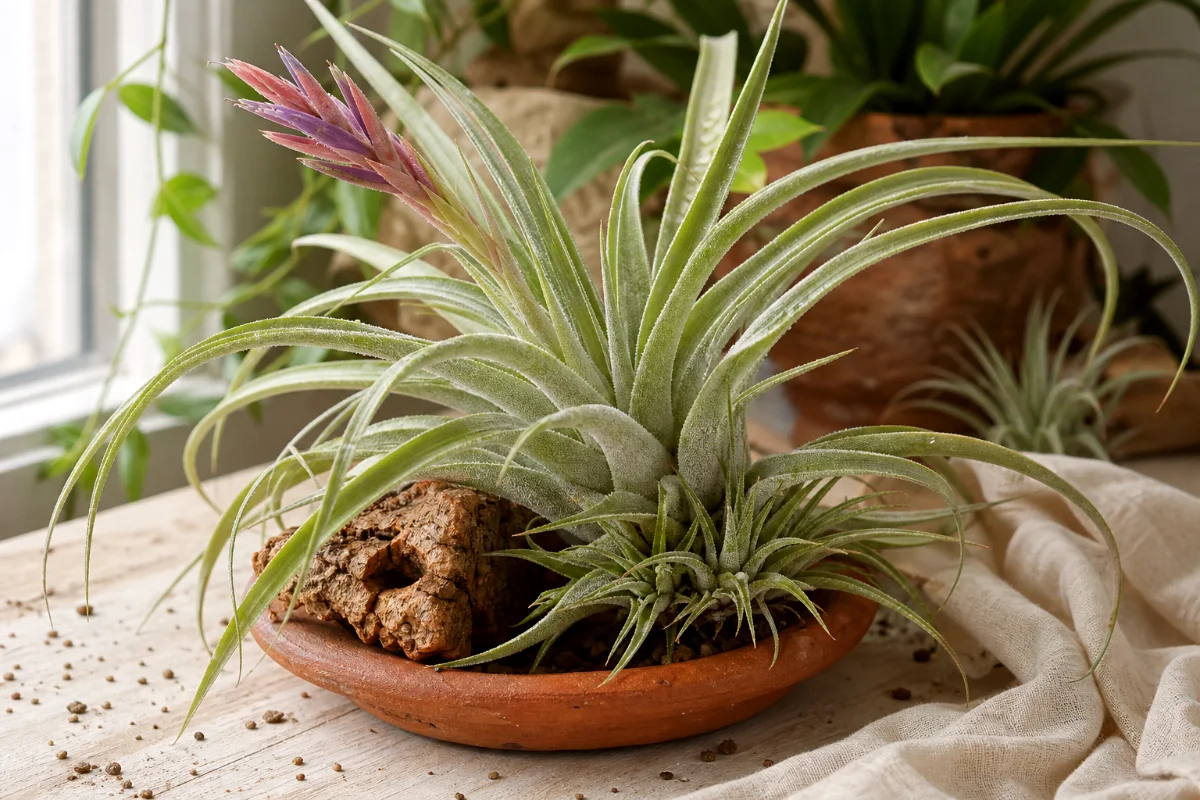
Most air plants, also called Tillandsia, grow baby plants called pups after the parent plant flowers. These pups form at the base of the mother plant, tucked between the lower leaves like tiny green offsets.
If you’ve been hunting for seeds or trying to root air plant leaves, stop right there. Leaf cuttings won’t work with Tillandsia. The reliable beginner-friendly method is pup division.
What Is an Air Plant Pup?
An air plant pup is a baby air plant that grows from the base of a mature plant after blooming. It starts small, often hidden under the older leaves, then slowly grows into its own little rosette.
And yes, it can become a full-size plant.
The mother plant feeds that pup while it grows. That’s why timing matters. If you pull the pup too early, it may struggle because it hasn’t built enough strength to handle life on its own.
When to Propagate Air Plants
The best time to propagate air plants is after the mother plant has flowered and the pup has reached the right size.
Don’t rush it. I know. Tiny pups are adorable, and every gardener gets itchy fingers now and then. But patience gives you a much better survival rate.
Wait Until the Pup Is One-Third to One-Half the Parent’s Size
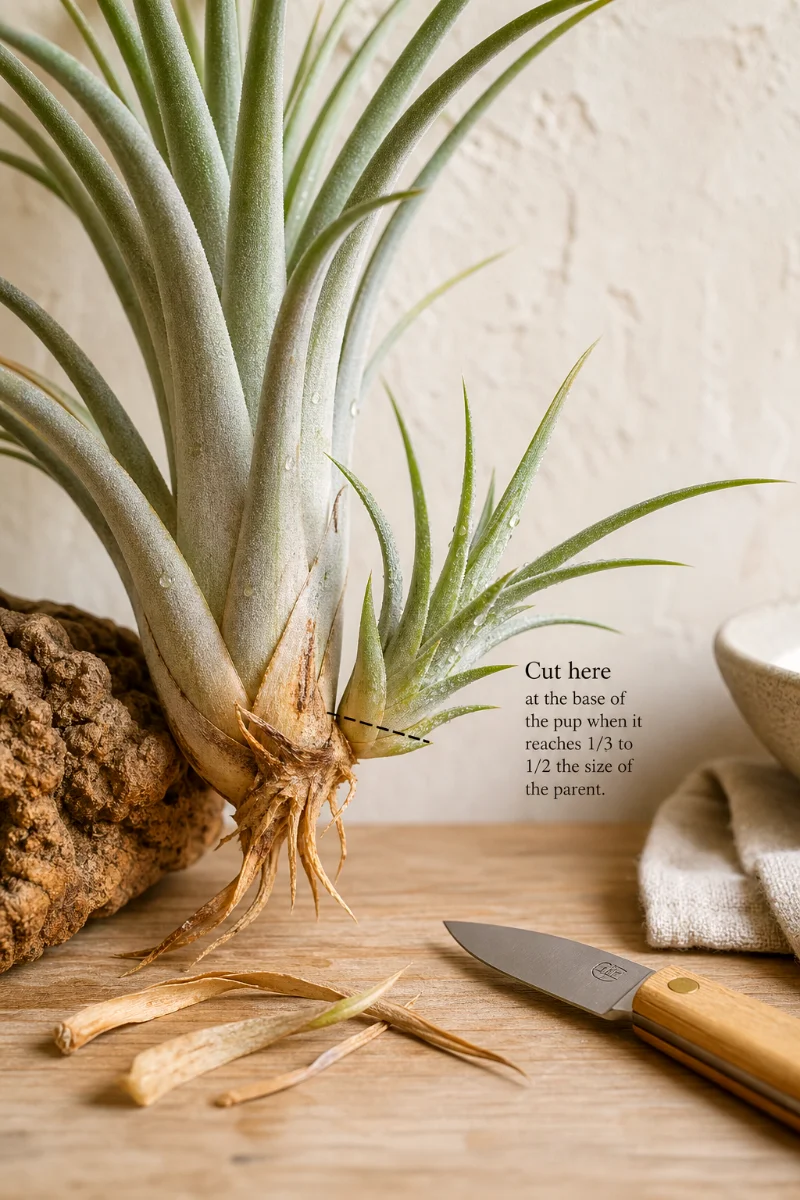
This is the size rule I trust most: remove the pup when it’s about one-third to one-half the size of the mother plant.
Smaller than that, and it’s often too young. Larger than that, and it’s usually easy to separate without drama.
You don’t need a ruler. Just look at the two plants side by side. If the pup still looks like a little green nub, let it grow. If it has a clear shape and several leaves of its own, you’re close.
Look for a Firm, Healthy Pup
A ready pup should feel firm, not mushy. The leaves should look plump and evenly colored for that variety.
Skip propagation for now if you see:
- Soft brown tissue at the base
- A sour or rotten smell
- Leaves falling apart when touched
- A pup that still barely peeks out from the mother plant
Healthy pups make the job simple. Weak pups make you earn every leaf.
Tools You Need Before Separating Air Plant Pups
You can often remove pups with your fingers, but keep a clean blade nearby. Some pups cling like they’ve signed a lease.
Gather these first:
- A sharp sterile knife or small pruning blade
- Clean hands
- A towel or soft cloth
- A shallow bowl of water for later watering, if needed
- A bright spot with indirect light for aftercare
Sterilize your blade before cutting. I use rubbing alcohol and let the blade dry. This small habit prevents a lot of ugly rot problems.
How to Propagate Air Plants from Pups
This is the part everyone wants.
Go slowly. Air plants can take gentle handling, but they don’t love being twisted like bottle caps.
Step 1: Wait for the Mother Plant to Bloom
Most air plants produce pups after flowering. Some send up one pup. Others produce several. A happy plant may surprise you with a whole little family.
Once blooming ends, keep caring for the mother plant as usual. Give it bright indirect light, regular watering, and good airflow. The pup needs that energy.
Step 2: Let the Pup Reach the Right Size
Wait until the pup reaches one-third to one-half the size of the parent plant. This can take weeks or months, depending on the species, light, watering, and general mood of the plant.
So don’t panic if nothing happens fast. Air plants don’t live by our calendars.
Step 3: Hold the Mother Plant Steady
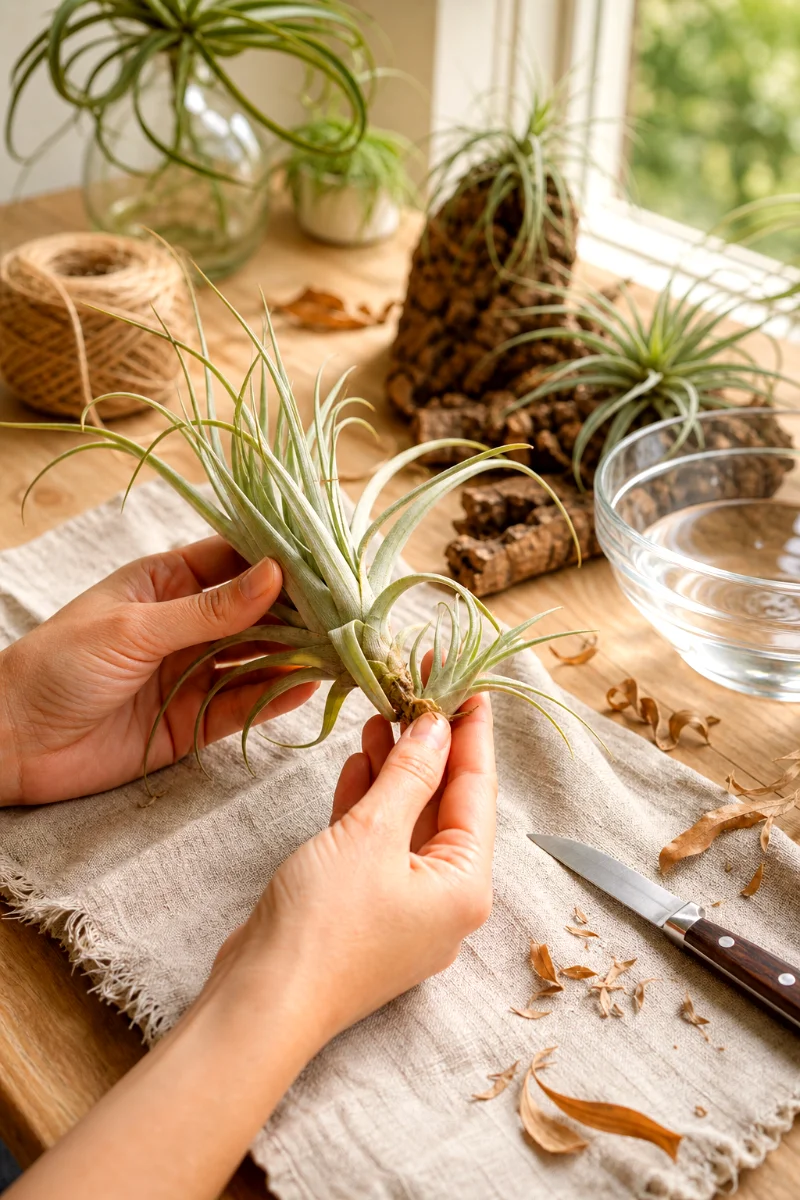
Place the mother plant on a clean towel or hold it gently in your hand. Support the base so you don’t crush the leaves.
Find where the pup attaches to the mother plant. That’s your separation point.
Step 4: Gently Pull the Pup Away
Grip the pup near its base, not by the leaf tips. Then pull it away from the mother plant with a slow, gentle motion.
A slight wiggle helps.
But don’t yank. If it resists hard, stop. A stubborn pup can tear if you force it, and torn tissue invites rot.
Step 5: Cut Stubborn Pups with a Sterile Knife
If the pup won’t release, use your sharp sterile knife. Cut as close to the connection point as you can without slicing into the heart of either plant.
Make one clean cut.
Clean cuts heal better than ragged tears. That’s true in the garden, the greenhouse, and every kitchen windowsill propagation project I’ve ever seen.
Step 6: Remove Dead Lower Leaves
After separation, check the pup’s base. Gently peel away any dead, dry leaves.
This does two helpful things. It lowers the chance of rot, and it gives the new plant a cleaner base for gripping cork, wood, stone, or another display surface.
Don’t strip healthy leaves. Dry leaves only.
Step 7: Let the Pup Rest, Then Care for It Like an Adult
Set the pup in bright indirect light with good airflow. If you made a cut, I like to let the base dry for a few hours before watering.
After that, treat the pup like a grown air plant. Same light. Same watering rhythm. Same need for airflow after soaking.
Should You Remove Air Plant Pups or Leave Them Attached?
You don’t have to separate the pups.
Really.
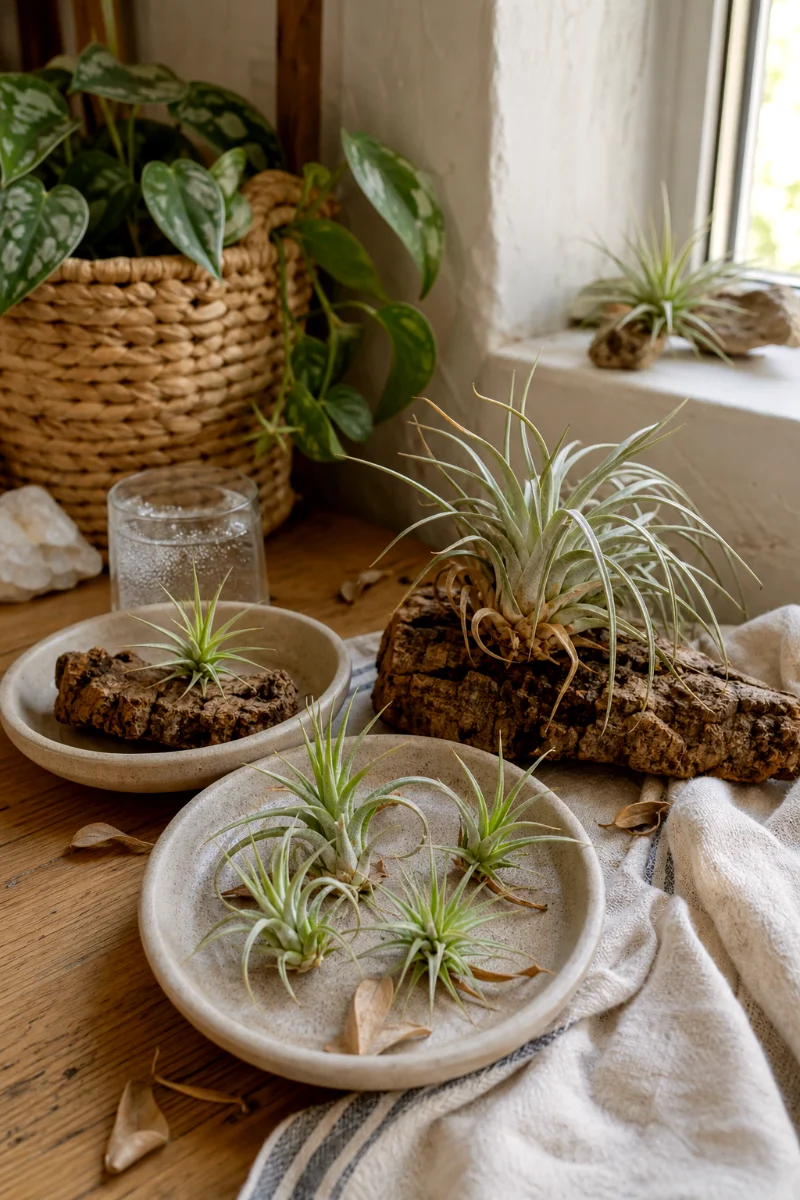
If you leave them attached, they grow into a clump. Many air plant growers prefer this look because it feels natural and full, especially with species that produce several pups after bloom.
Remove Pups If You Want More Individual Plants
Separate pups when you want to share plants, mount them in different places, or keep the original display tidy.
Individual plants also dry a bit more easily after watering, which can help beginners avoid rot.
Leave Pups Attached If You Want a Bigger Display
Leave pups in place if you love the look of a living cluster. A clump can bloom beautifully over time as different plants mature at different rates.
Just watch drying time. Dense clumps hold water longer in the center. Shake them out well after watering and place them where air can move around the leaves.
What Happens to the Mother Air Plant?
Here comes the bittersweet part.
After an air plant blooms and produces pups, the mother plant slowly declines. That’s normal. You’re not failing.
It may take months. Sometimes it takes a year or more. During that time, the mother plant keeps supporting the pups while they size up.
Don’t toss the mother plant just because the bloom has faded. Keep watering it, keep giving it light, and let it finish its job.
How to Care for a Newly Separated Air Plant Pup
New pups don’t need fancy treatment. They need steady care and a little common sense.
Give Bright Indirect Light
Place the pup near a bright window, but keep it out of harsh direct sun unless you know the variety can handle it.
East-facing windows often work well. A few feet back from a bright south or west window can also suit many Tillandsia types.
If the leaves start bleaching or crisping fast, the light may be too strong. If the plant stretches, dulls, or stays wet too long, it may need more brightness and airflow.
Water Regularly, Then Dry Completely
Most air plant pups do well with a soak or thorough rinse, followed by full drying.
Here’s the part beginners miss: drying matters as much as watering. Air plants can drink through their leaves, but trapped water at the base can lead to rot.
After watering, shake off extra water and place the pup upside down or on its side for a few hours. Let the leaf bases dry before returning it to a display holder.
Keep Air Moving
Air plants don’t want stale, wet pockets of air. Good airflow helps them dry evenly and keeps the base healthy.
This doesn’t mean blasting them with a fan all day. Just avoid sealed glass globes, damp bathrooms with no ventilation, or tight containers that trap moisture.
Fertilize Lightly for Stronger Growth
Use a water-soluble Bromeliad or Orchid fertilizer about once a month during active growth. Dilute it more than the label suggests if you’re unsure.
Light feeding can encourage pup production and support stronger growth. Heavy feeding can burn air plants. More isn’t better here.
Common Mistakes When Propagating Air Plants
I’ve seen these mistakes many times, and I’ve made a few myself. Air plants forgive some things. Rot, not so much.
Removing Pups Too Early
This is the big one. A tiny pup may look ready because it has leaves, but it still depends on the mother plant.
Wait for that one-third to one-half size range. It saves heartbreak.
Using a Dirty Blade
A dirty knife can spread bacteria or fungus into fresh cuts. Clean the blade before every cut.
It’s boring. It works.
Mounting the Pup Before It Dries
If you glue or tuck a damp pup into a tight holder, moisture can sit at the base. That creates perfect conditions for rot.
Let the plant dry fully first. Then display it.
Putting Pups in Soil
Air plants don’t grow in potting soil. Soil holds too much moisture around the base and can rot the plant quickly.
Mount pups on cork, driftwood, stone, shells, or place them in airy holders. Keep the base free to breathe.
How to Encourage More Air Plant Pups
You can’t bully an air plant into making pups, but you can give it the kind of care that supports pup production.
- Give bright indirect light so the plant has enough energy.
- Water consistently, then dry the plant fully.
- Use diluted Bromeliad or Orchid fertilizer monthly during active growth.
- Keep the plant warm, but not baked.
- Don’t remove spent blooms by tearing into the plant’s center.
And remember, pups usually follow flowers. A plant that hasn’t reached blooming age may simply need more time.
How Long Does Air Plant Propagation Take?
Air plant propagation moves at houseplant speed, not vegetable garden speed.
Once the mother plant blooms, pups may appear fairly soon, but growing them to separation size can take several months. Some species grow faster than others. Your home conditions matter too.
Warmth, bright filtered light, steady watering, and airflow all help. Low light and dry neglect slow everything down.
Best Displays for New Air Plant Pups
Once your pup has settled in, display it somewhere airy and easy to water. I like displays that let you remove the plant for soaking, because glued-in plants can become a nuisance fast.
Good beginner options include:
- Small pieces of cork bark
- Untreated driftwood
- Shallow ceramic dishes with pebbles
- Open wire holders
- Clear glass cups that don’t trap the base tightly
Skip closed terrariums unless you leave them open and keep moisture low. They look cute for about five minutes, then many turn into rot boxes.
FAQ About Propagating Air Plants
Can you propagate air plants from leaves?
No. Air plant leaves won’t root into new plants. Propagate Tillandsia by separating pups that grow from the mother plant after flowering.
How big should air plant pups be before removing them?
Wait until pups reach at least one-third to one-half the size of the parent plant. That size gives them a much better chance of growing well on their own.
Do air plants die after making pups?
The mother plant slowly dies after blooming and producing pups, but this can take months or even a year. Keep caring for it while the pups mature.
Can I leave air plant pups attached forever?
Yes. You can leave pups attached so they form a larger clump. Just make sure the cluster dries well after watering.
What should I do if a pup won’t come off?
Don’t force it. Use a sharp sterile knife to cut the pup away at the base, then let the cut area dry before watering again.
When should I water a newly separated air plant pup?
If you pulled it off cleanly, you can return to normal watering soon. If you cut it, let the base dry for a few hours first, then water and dry it completely.