How to Propagate Calathea by Division

Calathea, now technically called Goeppertia, has a reputation for being fussy. Fair enough. It curls its leaves when it’s thirsty, sulks in dry air, and spots if you look at it wrong with hard tap water.
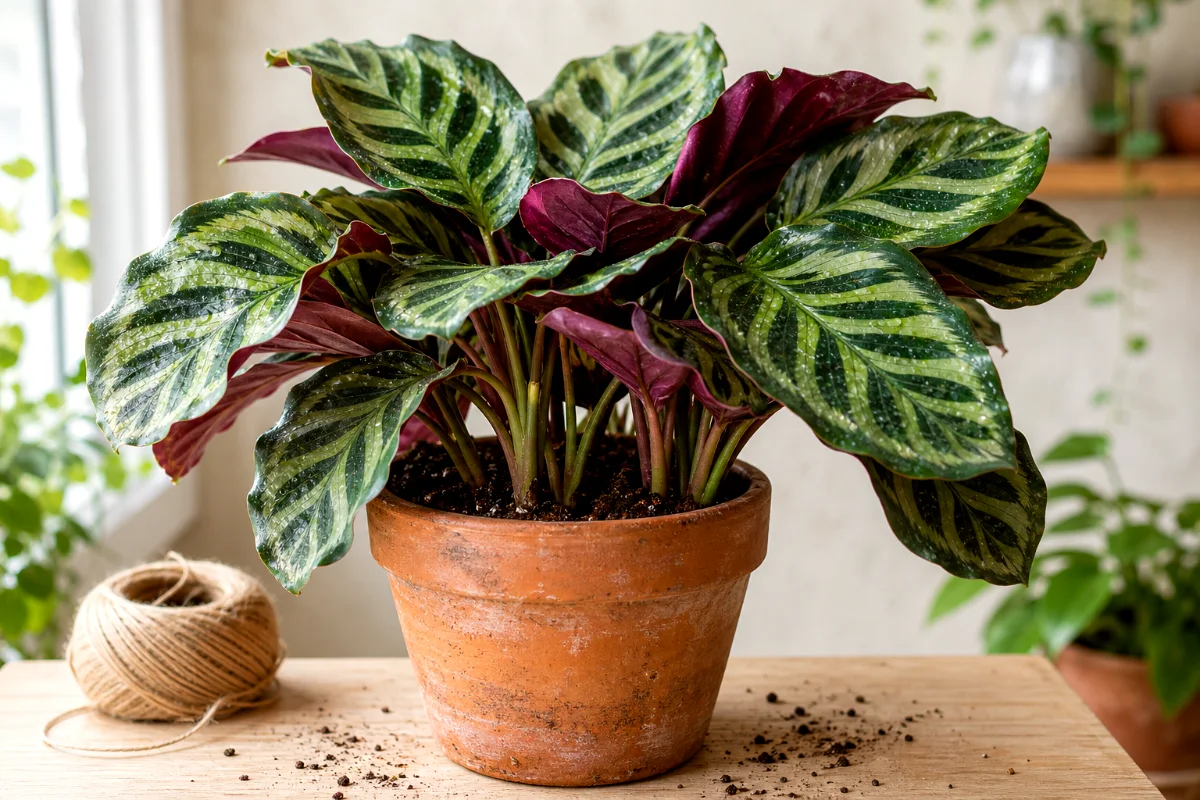
But propagation? That’s simpler than people make it sound.
The best way to propagate calathea is by division. You split a mature, crowded plant at the roots during spring repotting, then pot each rooted section into its own container. No stem cuttings. No leaf cuttings. No wishful thinking in a jar of water.
Sorry. Calathea doesn’t play that game.
Can You Propagate Calathea from Cuttings?
No, not in the way you can with pothos, philodendron, or monstera.
A calathea leaf cutting won’t grow a new plant because it doesn’t contain the growing points needed to make roots and shoots. You might keep a pretty leaf alive in water for a while, but it won’t turn into a full plant.
Calathea propagation works through division because the plant grows from underground rhizomes and root clumps. When you separate a section that already has roots and leaves, you’ve got a real plant, not a hopeful leaf.
That’s the trick. Start with roots.
Best Time to Propagate Calathea
Spring is the best time to propagate calathea, especially when you’re already repotting.
In spring, the plant starts pushing new growth. That means it has more energy to recover from the shock of being handled, split, and moved into fresh soil. I don’t like dividing calathea in winter unless the plant has a serious issue, such as root rot or a broken pot.
Calathea can bounce back. But don’t ask it to do hard work in the dark months.
What You Need Before You Start
Gather everything first. Once the plant is out of its pot, you don’t want to run around looking for perlite with soil on your sleeves.
- A healthy, mature calathea with several stems or clumps
- Clean pots with drainage holes
- Fresh, damp, well-draining potting mix
- Perlite, if your soil mix feels heavy
- Clean pruning shears or a sharp knife
- Room-temperature water
- A clear plastic bag or humidity dome
- A towel or tray to catch soil
For soil, use a light houseplant compost or a simple mix of 2 parts potting soil to 1 part perlite. The goal is moisture without soggy roots. Calathea likes damp soil, not swampy muck.
How to Propagate Calathea by Division
This is a hands-on job, but it’s not rough work. Think patient fingers, not brute force.
1. Choose a Mature, Healthy Plant
Pick a calathea that looks full, crowded, and well-rooted. You want multiple stems or natural clumps coming from the soil.
Don’t divide a weak plant unless you’re trying to save it from rot. A struggling plant has less energy to recover, and division adds stress. I know it’s tempting to make more plants from a sad one. Usually, that just makes more sad plants.
2. Water It a Few Days Before Division
Water the plant 2 or 3 days before you divide it.
This softens the root ball and hydrates the plant. Moist roots bend better than dry roots, which snap like old spaghetti. You don’t want the soil dripping wet on propagation day, just evenly damp and easy to work with.
3. Remove the Calathea from Its Pot
Tip the pot sideways and slide the plant out gently. If it sticks, squeeze the sides of the pot or run a clean knife around the inside edge.
Never yank from the leaves. Calathea stems can tear at the base, and then you’ll be annoyed before you’ve even started.
Once it’s out, loosen the outer soil with your fingers. Shake away only what comes off easily. You don’t need bare roots, and honestly, calathea doesn’t thank you for overhandling.
4. Find the Natural Clumps
Look closely at the root ball. Most mature calatheas grow in clusters. You may see separate crowns, each with its own stems and roots.
That’s where you split.
A good division should have:
- At least 2 leaves, though 3 to 7 leaves is better
- A fair amount of attached roots
- A firm crown or rhizome section
- No mushy, black, or sour-smelling roots
Small divisions can survive, but bigger ones recover faster. If you’re a beginner, make fewer, larger plants. Tiny pieces look cute for a week, then they often sulk themselves into oblivion.
5. Separate the Roots Gently
Use your fingers to tease the root ball apart. Work slowly from the outside toward the middle.
Some roots will break. That’s normal. But try to keep each section as intact as you can.
If the plant is badly root-bound, don’t wrestle it for twenty minutes. Use a clean, sharp knife to cut through the tough rhizomes. Make one confident cut instead of shredding the whole thing with nervous tugging.
6. Pot Each Division
Choose a pot only slightly larger than the new division’s root system. Big pots hold too much wet soil around small roots, and that’s how rot starts.
Add damp potting mix to the bottom, set the division at the same depth it grew before, then fill around the roots. Press lightly. Don’t pack the soil like concrete.
Water gently until the mix settles. If the plant sinks too low, add a little more soil around the base.
7. Give the New Plants High Humidity
This part matters more than most beginners expect.
Fresh divisions lose moisture while their roots recover. High humidity helps the leaves stay hydrated and reduces crispy edges. Place each pot in bright, indirect light, then cover it loosely with a clear plastic bag if your home runs dry.
Keep the bag from pressing against the leaves. Use chopsticks, plant stakes, or a small hoop of wire if needed. Open the bag for a few minutes each day to let fresh air in.
Think mini greenhouse, not sealed lunch bag.
Aftercare for Newly Divided Calathea
The first few weeks decide how well your divisions settle in. Be steady. Don’t fuss every hour.
Light
Place new divisions in bright, indirect light. An east-facing window works beautifully, or a spot a few feet back from a brighter window.
Direct sun can scorch calathea leaves, especially while the plant is stressed. If the leaves fade, crisp, or curl during the day, move the plant back.
Water
Keep the soil lightly moist, not soaked.
Water when the top inch feels barely dry. Calathea roots need oxygen as much as moisture, so don’t let the pot sit in a saucer of water. If your tap water is hard or heavily treated, use filtered water, rainwater, or water that has sat out overnight.
Humidity
Aim for humidity above 50 percent if you can. Higher is better during recovery.
You can raise humidity by using:
- A clear plastic bag for the first 1 to 2 weeks
- A small humidifier nearby
- A pebble tray with water below the pot
- A group of houseplants placed close together
Misting gives a short burst, but it doesn’t fix dry air for long. I still mist sometimes because it feels nice. But a humidifier does the real work.
Fertilizer
Wait a few weeks before feeding.
New roots need time to settle. Fertilizer too soon can burn tender roots or push growth before the plant has recovered. After 3 to 4 weeks, feed with a half-strength balanced houseplant fertilizer during the growing season.
Common Mistakes When Propagating Calathea
Calathea division isn’t hard, but a few habits can make it harder than it needs to be.
- Dividing a plant that’s too small: Wait until the plant has several clumps and a full root system.
- Making divisions too tiny: Each section needs leaves and roots, not just a hopeful nub.
- Using heavy soil: Dense soil stays wet too long and invites root rot.
- Putting divisions in direct sun: Bright shade beats harsh sunlight every time.
- Skipping humidity: Dry air can cause curled leaves, crispy edges, and slow recovery.
- Feeding too soon: Let the roots settle before adding fertilizer.
How Long Does Calathea Take to Recover After Division?
Most calathea divisions need 2 to 6 weeks to look settled again.
Some plants perk up in days. Others droop, curl, and act deeply offended. Don’t panic unless the stems turn mushy or the soil smells rotten.
You may lose an older leaf or two. That’s normal. New growth tells you the division has taken hold.
Signs Your Calathea Division Is Doing Well
Watch the plant, but don’t hover. Calathea will tell you plenty.
- Leaves open and close with the day and night cycle
- Stems feel firm at the base
- Soil dries slightly between waterings
- No sour smell comes from the pot
- New leaves appear after a few weeks
If the plant holds steady for a month, you’ve probably done it right.
Troubleshooting: When Things Look Rough
Leaves Curling After Division
Curling usually means stress, low humidity, dry soil, or too much light.
Check the soil first. If it’s dry, water thoroughly. If it’s wet, raise humidity and improve airflow. Move the plant out of direct sun.
Leaves Turning Yellow
One yellow leaf after division doesn’t bother me. Several yellow leaves can point to overwatering, root damage, or soil that stays too wet.
Let the top inch of soil dry slightly before watering again. Make sure the pot drains freely.
Brown Crispy Edges
Dry air causes this more than people want to admit.
Increase humidity and avoid hot vents, cold drafts, and strong sun. Also check your water quality. Calathea often reacts badly to mineral-heavy tap water.
Drooping That Won’t Improve
Drooping right after division is common. Drooping for weeks needs attention.
Slip the plant from the pot and check the roots if the soil smells bad or stays wet. Healthy roots look pale, tan, or light brown and feel firm. Rotten roots turn dark, soft, and unpleasant.
FAQ About How to Propagate Calathea
Can I propagate calathea in water?
Not from a leaf or stem cutting. You can rinse roots during division, but each new plant still needs roots, leaves, and a crown. Pot divisions into soil after separating them.
Can I split calathea anytime?
You can, but spring gives the best results. Avoid winter division unless you need to save a damaged plant.
How many leaves should each division have?
Aim for 2 to 7 leaves per section. More leaves and more roots give the division a better chance of quick recovery.
Should I cut off damaged leaves after propagating?
Yes, if a leaf is badly yellow, torn, or crispy. Leave partly healthy leaves alone because they still help the plant make energy.
Why is my calathea sad after dividing?
Division disturbs the roots, and calathea hates root disturbance. Keep humidity high, light gentle, and soil evenly moist. Give it time.