How to Propagate Aloe Vera from Leaf

You can try to propagate aloe vera from a leaf. But I want to be plain with you. It often fails.
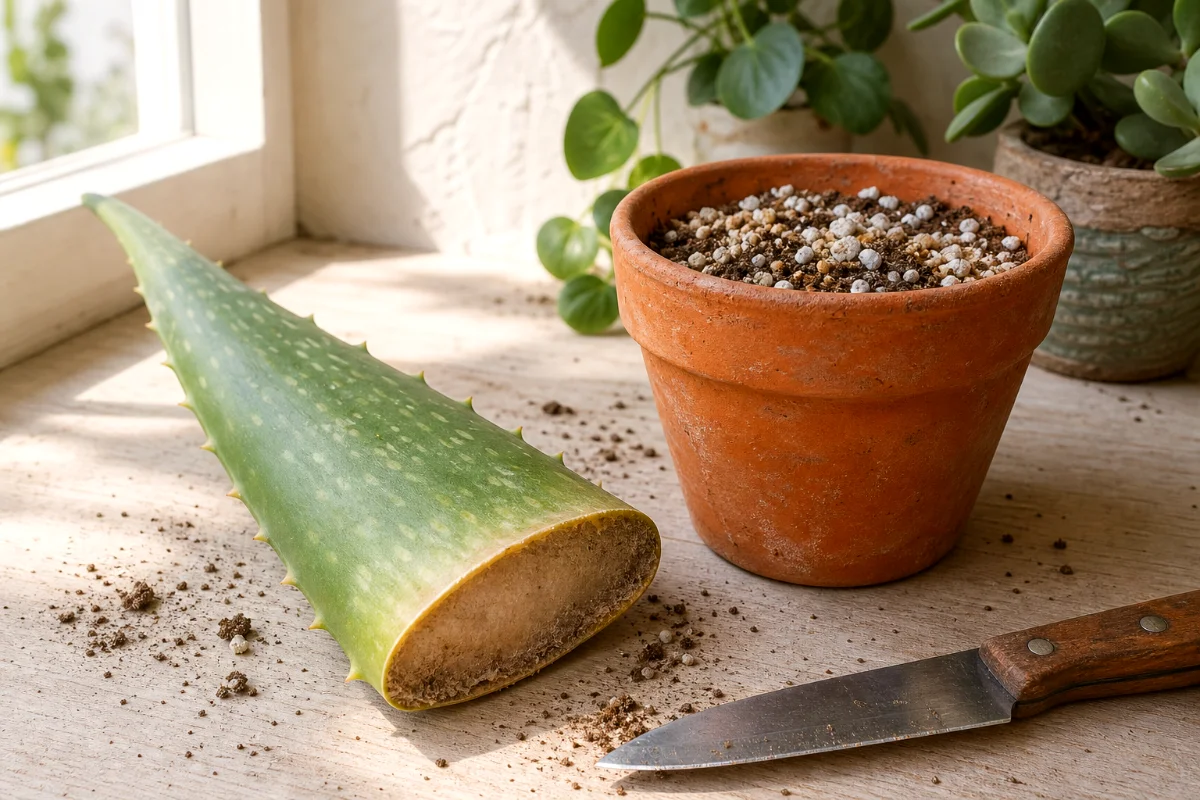
Aloe vera doesn’t behave like some succulents that root easily from a single leaf. Many aloes need a small bit of stem tissue to grow a real new plant. A leaf cutting may root, sit there looking fine for weeks, then slowly shrivel or rot without ever making pups.
Still worth trying? Sure. Just don’t pin your hopes on one lonely leaf.
If your aloe has offsets, also called pups, use those first. Pup propagation gives beginners a much better shot because each pup already has the structure of a tiny plant.
Why Aloe Leaf Propagation Is So Tricky
Aloe leaves hold a lot of water. That juicy gel helps the plant survive dry spells, but it also makes cut leaves prone to rot.
The cut end stays wet inside. If you push it straight into soil, bacteria and fungi can move in fast. That’s why drying the cut end matters so much.
There’s another catch. A leaf alone may not have the growth tissue needed to make a new plant. So even when roots appear, a pup may never form.
That sounds fussy because it is. Aloe vera likes to do things its own way.
Best Time to Try Aloe Vera Leaf Propagation
Spring and early summer give you the best odds. The plant has stronger light, warmer air, and more energy for growth.
Avoid taking cuttings in winter if you can. Cool rooms and weak light slow everything down, and wet soil stays wet for too long.
If you live somewhere warm and bright year-round, you have more wiggle room. Still, I prefer spring. Plants wake up then.
What You’ll Need
- A healthy mature aloe vera plant
- A clean, sharp knife
- A small terracotta pot with a drainage hole
- Cactus soil or succulent mix
- Perlite, pumice, or coarse sand
- Rooting hormone, optional
- A warm, dry spot for callusing
Skip heavy potting soil. It holds too much moisture around the cut end, and that can turn your hopeful cutting into mush.
How to Propagate Aloe Vera From Leaf
Step 1: Choose a Healthy Mature Leaf
Pick a firm, mature leaf from the outer, lower part of the plant. These leaves have more stored energy than the small inner leaves.
Look for a leaf with rich green color, good thickness, and no soft spots. Don’t choose a leaf that’s wrinkled, yellow, bruised, or pest-damaged.
And don’t strip a young aloe bare. Take one leaf from a plant that can spare it.
Step 2: Cut the Leaf at the Base
Use a clean, sharp knife. Cut the leaf as close to the main stem as you can.
A ragged cut invites rot. A clean cut heals faster.
I wipe my knife before cutting, even if it already looks clean. It takes ten seconds and saves trouble later.
Step 3: Let the Cut End Form a Callus
This is the step beginners rush. Don’t.
Set the leaf in a warm, dry place for 2 to 3 days. If the leaf is thick, give it up to a week. You want the cut end to dry over and form a tough skin.
That skin is the callus. It acts like a seal and lowers the chance of rot once the leaf touches soil.
Lay the leaf on a paper towel, a piece of cardboard, or a clean saucer. Keep it out of direct hot sun. Bright shade works well.
Step 4: Prepare a Fast-Draining Soil Mix
Use a gritty mix. Aloe roots hate sitting wet.
A simple beginner blend works well:
- 2 parts cactus or succulent soil
- 1 part perlite, pumice, or coarse sand
Choose a small pot. Bigger pots hold extra damp soil, and damp soil is the enemy here.
Terracotta helps because it breathes. Plastic can work, but you need to water even less.
Step 5: Plant the Callused End
Dip the callused end in rooting hormone if you want. It may help, but it won’t fix a weak leaf or soggy soil.
Make a small hole in the mix. Bury the cut end 1 to 2 inches deep, then firm the soil gently around it so the leaf stands upright.
If the leaf flops, use a small bamboo skewer or a bit of twine for support. Don’t pack the soil hard. Aloe roots like air.
Step 6: Place It in Bright, Indirect Light
Give the cutting bright light without harsh midday sun. A sunny windowsill with a sheer curtain works nicely.
Too little light slows the process. Too much direct sun can scorch and dry the leaf before it has a chance.
Warmth helps. Aim for a comfortable room, not a chilly corner.
Step 7: Water Sparingly
Go easy here. Seriously.
After planting, wait a few days before watering. Then water lightly only when the soil feels completely dry from top to bottom.
Don’t mist the leaf. Don’t keep the soil damp. Don’t water on a schedule just because a calendar says so.
Check the mix with your finger or a wooden skewer. If it comes out with soil stuck to it, wait.
Step 8: Wait for Roots or Pups
This part tests patience.
It may take several weeks or several months to see anything happen. If it works, small pups may appear near the base. Sometimes roots form first, hidden under the soil.
Resist the urge to tug on the leaf every few days. That breaks tiny new roots.
If the leaf stays firm, keep waiting. If it turns black, mushy, or smells sour, toss it and try again with a cleaner cut and drier mix.
Signs Your Aloe Leaf Cutting Is Working
- The leaf stays firm instead of collapsing
- The base remains dry and clean, not slimy
- The leaf shows slight resistance after several weeks
- New tiny pups appear at the soil line
A little wrinkling doesn’t always mean failure. The leaf uses stored moisture while it tries to root.
Mush is different. Mush means rot.
Common Mistakes That Ruin Aloe Leaf Cuttings
Planting the Leaf Before It Calluses
Fresh aloe cuts are wet. Soil plus wet aloe tissue often leads to rot.
Let the wound dry. A few days on the counter can make the difference between a fair try and a slimy mess.
Using Regular Potting Soil
Regular potting soil works for many leafy houseplants, but it holds too much moisture for aloe cuttings.
Add perlite, pumice, or coarse sand. If the mix feels fluffy and dries fast, you’re on the right track.
Watering Like It’s a Basil Plant
Aloe isn’t basil. It doesn’t want constant moisture.
Water lightly, then wait until the mix dries out fully. When in doubt, wait another day or two.
Taking a Weak Leaf
A thin, damaged, or yellow leaf starts behind. It has less stored energy and more stress.
Choose the best leaf you can spare. Propagation favors strong material.
Aloe Vera Leaf Propagation vs Pup Propagation
If your aloe vera has pups, use them. I know leaf propagation sounds neat, but pups win almost every time.
A pup is already a small aloe plant. It usually has its own leaves, and often it has small roots too. That gives it a head start.
To remove a pup, loosen the soil and gently separate it from the mother plant. Try to keep some roots attached. Pot it in dry succulent mix, wait a few days, then water lightly.
That’s the method I recommend for beginners. Leaf cuttings are more of an experiment.
How Long Does Aloe Vera Take to Propagate From a Leaf?
Expect weeks at the very least. Months would not surprise me.
Some leaf cuttings sit and do nothing for a long time. Others rot within two weeks. A few root and push out pups.
Plant propagation teaches patience fast. Aloe leaf propagation teaches it with a raised eyebrow.
Should You Use Rooting Hormone?
You can use rooting hormone, but keep your expectations reasonable.
Rooting hormone may encourage roots on the callused end. It doesn’t guarantee pups, and it won’t save a cutting from wet soil.
If you use it, tap off the extra powder. A light dusting is enough.
Best Pot for Aloe Leaf Cuttings
Use a small pot with a drainage hole. I like terracotta because it dries faster than glazed ceramic or plastic.
A pot that looks a bit too small usually works better than one that’s too roomy. Extra soil means extra moisture.
If you only have a deeper pot, fill it with a gritty mix and water with a light hand.
Troubleshooting Aloe Leaf Propagation
The Leaf Turned Brown and Mushy
Rot got in. This usually happens from planting too soon, watering too much, or using soil that stays wet.
Start over with a fresh leaf. Let it callus longer next time.
The Leaf Is Shriveling
Some shriveling is normal. The leaf uses stored water while waiting for roots.
If it shrivels fast and feels hollow, it may not have enough strength to keep going.
Nothing Has Happened After a Month
That can be normal. Aloe leaf cuttings don’t move quickly.
Keep it warm, bright, and dry between light waterings. Don’t fuss with it too much.
The Leaf Fell Over
The soil may be too loose, or the leaf may be too shallow.
Replant the callused end 1 to 2 inches deep and add a small support. Keep the base dry while it settles.
FAQ
Can aloe vera grow roots from a leaf?
Sometimes, yes. But roots don’t always mean you’ll get a new plant. Aloe vera often needs stem tissue to produce reliable new growth.
Can I propagate aloe vera in water?
I don’t recommend it. Aloe leaves rot easily in water. Soil propagation with a dry callus gives you a better chance.
How deep should I plant an aloe leaf cutting?
Plant the callused end about 1 to 2 inches deep. Keep the leaf upright and avoid burying too much of it.
Do I water aloe cuttings right away?
No. Wait a few days after planting, then water lightly only when the soil has dried completely.
Why is my aloe leaf cutting rotting?
Most rot comes from too much moisture. The leaf may not have callused long enough, or the soil may be too heavy.
Is it better to propagate aloe vera from pups?
Yes. Pup propagation works far better for most home gardeners. Use leaf propagation as a fun trial, not your only plan.
My Best Advice Before You Cut
Take one good leaf, let it dry longer than you think, and plant it in gritty soil.
Then start looking for pups on the mother plant. That’s where the real easy win usually waits.